
How To Activate A Travel eSIM In Under 5 Minutes: A Step-By-Step Guide
A travel eSIM is a digital version of a physical SIM card that’s built into your device, allowing you to access mobile data instantly without the need to swap small plastic chips. Forget about hunting for a paperclip or a local kiosk at the airport; this technology lets you download a data plan directly to your smartphone chip. It’s the ultimate convenience for anyone who values their time and sanity while navigating a new country.
In most cases, you can get connected in 5 minutes or less. Modern tools and automated systems have turned what used to be a tech-heavy chore into a quick, user-friendly process. As long as you have a stable Wi-Fi connection for the initial download, you can often cross the “Airport Test” by getting your data running before you even step off the plane.
This guide will walk you through the essential steps to ensure a smooth setup, starting with how to verify your device compatibility. We’ll provide a clear, step-by-step breakdown for both iOS and Android users, so you know exactly which buttons to tap. Finally, we’ll show you how to verify your connection and troubleshoot any minor hiccups so you can focus on your trip instead of your settings.
If you’re curious about the mechanics behind this tech, check out this comprehensive guide on how eSIM works to understand how it differs from your home carrier setup. While variables like network strength can play a role, the average wait time for eSIM network connection is typically just a few seconds after the QR code is scanned. Let’s get you online and ready to explore.
What You Need Before Activating a Travel eSIM
Before you hit the “buy” button on that tempting data plan, you need to ensure your hardware is actually ready for the digital jump. Getting a travel eSIM is a straightforward process, but it does require a specific environment to work. Think of it like prep work for a home renovation; if the foundation isn’t right, the rest won’t stick. You’ll need to verify your device’s technical capabilities, ensure its status with your home carrier is clear, and have a solid internet connection for the initial handshake between your phone and the network.
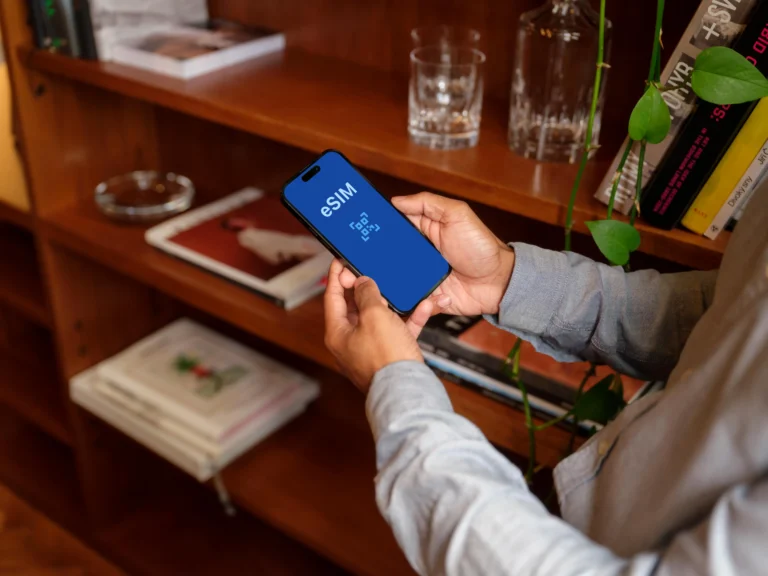
Phone Models and Devices That Support eSIM
 Photo by Jacob
Most modern smartphones manufactured in the last few years are built with an embedded SIM chip, but there are still plenty of older models roaming around that rely solely on plastic. For Apple users, any device from the iPhone 11 series and newer supports this technology, including the budget-friendly SE models. Android fans have a wide variety of options, with the Samsung Galaxy S20 series and later, as well as the Google Pixel 4 and its successors, all being eSIM-ready. If you are unsure about your specific handset, you can check the latest eSIM compatible phone list to confirm your model is on the roster for 2026 travel.
The biggest hurdle for most travelers isn’t the model of the phone, but its “carrier unlocked” status. If you bought your phone through a subsidized plan or a contract with a provider like Verizon, AT&T, or T-Mobile, they might have a software lock on the device. To check this on an iPhone, go to Settings, then General, and About. Scroll down to “Carrier Lock.” If it says “No SIM restrictions,” you are good to go. If it says anything else, you must call your carrier and ask them to unlock it for international travel before you can add a new digital line.
Internet Access Requirements for Activation
A travel eSIM isn’t something that magically appears because you bought a plan; it’s a digital profile that your phone must download from a server. This means you need a stable and reliable internet connection for the activation process to succeed. Many travelers make the mistake of trying to activate their eSIM the moment they land in a foreign country without a data plan. If the airport Wi-Fi is spotty or requires a local phone number to log in, you might find yourself stuck in a frustrating loop of failed downloads.
It’s best to handle the installation while you are still at home or sitting at your departure gate using a known Wi-Fi network. The file size of an eSIM profile is relatively small, but any interruption during the download can cause a glitch that requires technical support to reset. Having a secondary source of data, like your home carrier’s roaming or even a friend’s hotspot, can act as a safety net if things get hung up. Once that digital profile is safely stored on your phone’s chip, the hardest part of the tech journey is over.
When to Activate at Home vs After Arrival
One of the best strategies for a stress-free trip is the “buy before you fly” approach. You can typically purchase and install your eSIM profile days or weeks before you actually leave. The installation process puts the digital SIM onto your phone, but that doesn’t necessarily mean your data plan starts ticking down immediately. Most travel eSIMs only “activate” the 7-day or 30-day window the moment they first connect to a local network at your destination. By installing it at home, you ensure that the QR code is scanned and the profile is ready for use without any airport Wi-Fi drama.
To keep your data safe and avoid premature activation, you should keep the new eSIM line toggled “Off” in your settings until you are on the plane or have just touched down. Once you arrive, you can switch the line to “On” and select it as your primary source for cellular data. This prevents your home SIM from racking up massive roaming fees while ensuring your travel plan is only used when you are actually in the country. To double-check if your specific phone is ready for this process, you can confirm device eSIM readiness through a verified hardware database.
The Fast 5 Minute eSIM Activation Process
Once you have confirmed your phone is compatible and you have a solid Wi-Fi connection, the actual setup is remarkably quick. I usually tell people that if you can scan a menu at a restaurant, you can install a travel eSIM. The process has become so polished that most of the work happens behind the scenes in your phone’s software. You are essentially just giving your device the digital “keys” to unlock a local network.
Whether you are staring at a QR code on your laptop or copying strings of text from an email, the goal is the same: getting that digital profile onto your embedded chip. It is a one-time setup that pays off the moment you touch down and see those local signal bars appear. Let’s break down the three main ways to get this done so you can pick the one that fits your current situation.
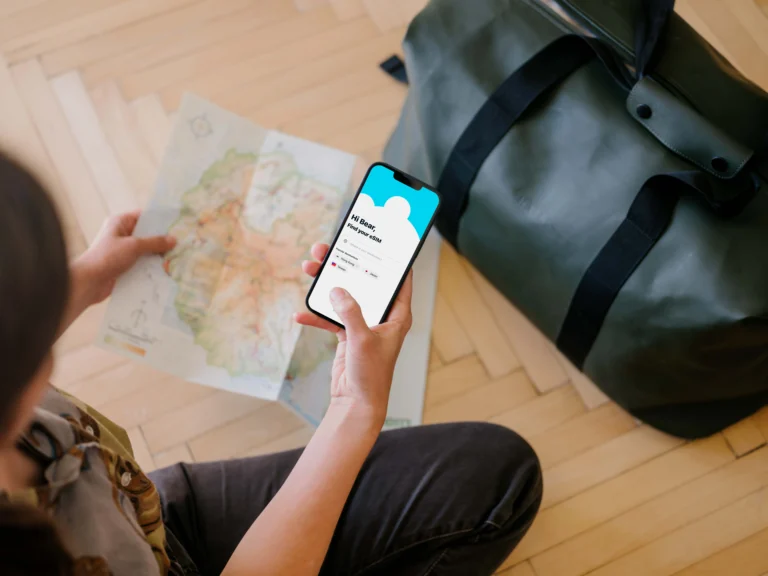
Scanning a QR Code to Install an eSIM
 Photo by Julio Lopez
Scanning a QR code is by far the most common way to get your data plan running. When you purchase a plan, the provider typically sends an email containing a unique code that holds all your network configuration details. It is a “scan it and forget it” method that takes about thirty seconds of actual effort.
The most important thing to remember is that you generally cannot scan the code using your standard camera app; you have to do it through your phone’s cellular settings. If you run into trouble during this specific part, you might need to fix iPhone eSIM activation errors by checking if the code was already partially processed.
To get started, follow these simple steps:
- Open your settings: On an iPhone, go to Settings > Cellular; on Android, go to Settings > Network & Internet > SIMs.
- Add the plan: Look for the button that says “Add eSIM” or “Add Data Plan.”
- Use the code: Point your phone’s camera at the QR code displayed on your laptop, tablet, or a printed sheet of paper.
- Confirm the download: Your phone will ask for permission to download the cellular profile; just hit “Continue” or “Add Plan.”
Activating eSIM via App or Manual Entry
Sometimes you don’t have a second screen available to display a QR code, or perhaps your provider offers a “Direct Installation” feature through their own mobile app. This is becoming a favorite for many travelers because it eliminates the need for scanning entirely. You simply open the provider’s app, find your purchased plan, and tap a button that says “Install eSIM.” The app then pushes the profile directly to your phone’s settings using a method called Push Provisioning, which is actually more secure than email based codes.
If the app isn’t an option and you can’t scan a code, you will need to perform a manual entry. This sounds intimidating but it is really just a copy-paste job. Your provider will give you an SM-DP+ Address and an Activation Code.
When you go to the “Add eSIM” screen in your settings, choose the option to “Enter Details Manually” at the bottom. Paste the SM-DP+ Address first, then the Activation Code. This method is the ultimate backup for when technology acts up. If you are using a specific device like a Vivo, you can follow a Vivo eSIM setup guide to find exactly where these manual fields are hidden.
Naming and Setting the eSIM Correctly
Once the profile is on your phone, you are going to see a new line appear in your settings. By default, your phone might give it a generic name like “Secondary” or “Business,” which is a recipe for confusion when you are trying to figure out which line is charging you for data. I always recommend using Smart Labels to keep things organized.
Changing the label takes ten seconds but saves you from accidental roaming charges on your home line. You want to be able to glance at your signal bars and know exactly which network is active.
Here are a few naming conventions that work well:
- Destination Name: Label it “Japan Data” or “UK eSIM.”
- Purpose: Use names like “Travel Data” to distinguish it from your “Home Primary” line.
- Provider Name: If you buy multiple plans, label them “Gohub” or “Airalo” so you know which support team to contact if there’s a glitch.
After naming the line, make sure you set it as the Primary Data source but keep your home line as the Primary Voice source if you still want to receive important texts. This setup ensures that all your Instagram uploads and map searches use the cheap travel data while your home number stays active for emergency calls or two-factor authentication codes.
Step-by-Step eSIM Setup on iPhone
Setting up your travel eSIM on an iPhone is truly one of the best parts of modern travel preparation; it’s designed to be quick, clean, and surprisingly foolproof. Forget the days of wrestling microscopic SIM trays with awkward tools; we are downloading our connection directly onto the phone’s embedded chip, which is a fantastic user experience upgrade. The goal here is integration; we want the new digital line to work when needed and disappear efficiently when it’s not.
This entire process, from scanning the code to actually browsing a webpage, often takes less than five functional minutes. Let’s walk through the configuration sequence specific to iOS, making absolutely certain your home line stays protected from costly surprises while you enjoy your trip. If you are using the latest hardware, you might also want to check out this iPhone 16 eSIM features and setup guide for device-specific enhancements.
Adding a Travel eSIM on iOS
Getting that new digital plan loaded onto your phone is the primary technical hurdle, and Apple has made the navigation quite intuitive. You are essentially telling your phone to accept this new digital identity and get ready to use it. For most of us, the setup starts right inside the main Settings menu, which is where all important network controls live.
First, you need to open the Settings app. From there, you tap into Cellular, which houses all your line management options. You will spot the option to Add eSIM. Tap this to begin the process. For users on newer versions of iOS, you might encounter a helpful screen that prompts you to Choose a Data Plan immediately after scanning or entering details.
This screen is your signal that the phone recognizes the new profile and is ready to assign it roles. If you’ve loaded multiple travel eSIMs previously, this is where you select the exact one you intend to activate for the current destination. Taking a moment to confirm the carrier name or plan description here prevents you from accidentally using an old or incorrect profile. Following a step-by-step eSIM configuration guide can help ensure you don’t miss these small but important prompts.
Choosing Primary vs Secondary Line
Once the eSIM profile is successfully downloaded onto your phone, iOS treats it as a second, fully functional line. This Dual SIM capability is the real magic, letting you keep two lines active simultaneously. The key to avoiding chaos and huge bills is correctly defining which line handles Voice/SMS and which line handles Cellular Data. This separation is non-negotiable for smart international travelers.
Your home line, which is usually tied to your primary physical SIM or the first installed eSIM you set up, should remain configured for Voice/SMS. Because that is the number that usually receives important two-factor authentication texts, banking alerts, or calls from family, you want this line available for incoming communications even if it’s turned off for data usage.
Conversely, your brand-new travel eSIM must be set as the one dedicated to Cellular Data. This is the entire point of buying the travel plan; all your mapping, social media scrolls, and email syncing will pull data from this digital line. By setting the travel eSIM for data and keeping the home line for voice, you establish a setup where you get affordable local internet access without accidentally using your home carrier’s roaming data rates. You can review this configuration at any time by heading back into the Cellular settings section.
Enabling Data Switching and Roaming Settings
Setting the lines correctly is half the battle; the other half is configuring the roaming behavior, which is where people sometimes get tripped up. For your travel eSIM, you need one setting to be ON and one setting to be explicitly OFF. This is a critical checkpoint before you leave your home Wi-Fi network.
First, find the settings specifically for your Travel eSIM line in the Cellular menu. You must ensure that Data Roaming is switched ON. This sounds counterintuitive, but for a travel eSIM, the provider has already arranged for those partner networks abroad. Turning Data Roaming ON for the travel line is what allows that digital profile to connect to the local networks in your destination country. Think of the travel eSIM as the “roam-ready” line.
Next, you need to look for an or option called Allow Cellular Data Switching. For the vast majority of travelers, this setting should be turned OFF. If this option is left on, your iPhone might try to use your home-line data if the travel eSIM signal temporarily dips. Since home line roaming rates are high, disabling this switching capability creates a hard barrier. You are telling your phone to use the travel eSIM for data, and if that fails, simply do not switch back to the home line. Learning how to manage two SIM lines on one phone is the best way to ensure you never return home to a surprise bill.
Step By Step eSIM Setup On Android
Setting up an eSIM on an Android device is a straightforward process that grants you instant access to local data networks without needing a physical card. While the Android ecosystem covers many different manufacturers, the core logic for installing a digital SIM remains consistent across most modern handsets. You are essentially adding a new network profile to your phone’s internal chip, allowing you to bypass expensive roaming fees.
This setup is best performed while you have a stable Wi-Fi connection, ideally before you depart for your trip. By handling the configuration early, you ensure that the digital handshake between your device and the carrier server happens without interruptions. Once the profile is downloaded, you have full control over when to turn the line on and which tasks it should handle.
Adding A Travel eSIM On Android Devices
To begin the installation, you need to head into your device’s primary connectivity menu. For the vast majority of Android phones, you start by opening Settings and navigating to Network & Internet. From there, look for the SIMs category. You’ll generally see a + icon or an Add button, which is the gateway for adding a second line to your device.
When you tap this, the phone will ask if you want to download a SIM instead of inserting a physical one. Once you confirm, the camera interface will open, prompting you to scan the QR code provided by your travel data provider. If you cannot scan the code because it is saved on the same device, many phones now offer an option to Enter Code Manually or even Choose From Photos to pull the QR data from a screenshot. Using a complete guide to installing eSIM on Android and iPhone can help you visualize these specific menu locations if the labels differ slightly on your version of Android.
APN And Network Settings To Check
An Access Point Name (APN) serves as the “gateway” between your phone and the internet. In most cases, a travel eSIM automatically populates these settings the moment it connects to a tower. However, if you see signal bars but can’t load a webpage, you likely need to enter the APN details manually. This is a common troubleshooting step for travelers using regional carriers that don’t always sync perfectly with the Android operating system.
To fix this, go to Settings > Network & Internet > SIMs, select your travel eSIM, and look for Access Point Names. If the list is empty, tap the + sign to create a new profile. Your eSIM provider will have sent you the specific Name and APN values in your confirmation email. Simply type them exactly as written, save the profile, and select it. Once the correct APN is active, your data should begin flowing immediately. If you find yourself frequently switching between plans for different countries, knowing how to switch between mobile data plans on Android ensures you always have the right settings active for your current location.
Common Android Setup Differences By Brand
The Android experience varies depending on whether you use a Google Pixel, a Samsung Galaxy, or a different brand like Motorola or OnePlus. While the underlying steps are the same, the terminology changes slightly. Google Pixel users will find everything under the “Network & Internet” menu, which offers a very “clean” and stock experience. Pixel devices are known for being particularly user-friendly when it comes to managing multiple digital lines at once.
Samsung users, on the other hand, usually need to look for the SIM Manager located inside the Connections menu. Samsung’s interface allows for a “Dual SIM Always On” feature, but it’s often safer for travelers to manage the lines manually to avoid confusion. Regardless of the brand, the logic is always: go to connection settings, find the SIM manager, and add the new profile. Even if the buttons look different, the “Add eSIM” function is a standard feature on all compatible Android hardware released after 2020.
| Feature | Google Pixel | Samsung Galaxy |
|---|---|---|
| Menu Path | Settings > Network & Internet | Settings > Connections > SIM Manager |
| Add Label | Download a SIM | Add eSIM |
| Manual Entry | Enter Code Manually | Enter Activation Code |
| Primary Data | Mobile Data Toggle | Preferred SIM for Data |
Checking these settings before you leave the airport Wi-Fi zone is a smart move to ensure you aren’t left without a map when you step into a new city. Proper labeling and setting your travel line as the primary data source will keep your connection fast and your bill low.
Using a Travel eSIM Alongside Your Regular SIM
This is where the actual travel hacking begins. Many people think that installing a travel eSIM means completely ditching their regular SIM card, but that is just not true for modern users. The best feature of contemporary phones—Dual SIM, Dual Standby—is that they are designed to handle two lines at once. Think of it like having two phone numbers in one wallet; one is for cheap, local data overseas, and the other is your rock-solid home line reserved for important contacts.
Getting this setup right is the difference between total connectivity peace of mind and checking your home carrier bill with sheer terror once you return. We want the travel eSIM to handle all the heavy lifting, like navigation and social posting, while your main SIM sits quietly, waiting for that specific verification text from your bank. By choosing the right travel data plan, you ensure that your device stays functional without sacrificing your primary identity.
Avoiding Accidental Roaming Charges
The single most important safety measure you take before leaving a Wi-Fi zone is correctly managing data roaming on your main home SIM profile. If you install your new travel eSIM but forget this one step, your phone will default to using your home carrier’s data the second it finds a foreign network signal. This leads to bills that can easily climb into the hundreds of dollars before you even order breakfast.
To prevent this financial disaster, you must turn off data roaming for your primary home line.
Here is the non-negotiable process for the two major operating systems:
- For iOS Users: Navigate to Settings, tap Cellular, and then tap on your Primary plan (which should be your home number). Inside that menu, find the Data Roaming toggle and switch it OFF. This physically tells your iPhone not to use any data from this line while you are abroad.
- For Android Users: The path is generally Settings > Network & Internet > SIMs. Select your primary SIM line, and you will find the Data Roaming switch. Keep this firmly in the OFF position.
Once you verify that data roaming is disabled on your home SIM, you can confidently turn your newly installed travel eSIM line to ON and set it as the preferred line for Cellular Data. This division of labor is the golden rule of using two lines together. The cost of a simple oversight here is simply not worth the risk. It is a quick check that saves you serious money.
Messaging and Calls While Using eSIM Data
A common point of confusion for first-time users is how they can still receive calls or texts on their original number if the data is coming from the new eSIM. The answer is simple: Your phone number is tied to the SIM profile itself, not the data connection. Because you only disabled data roaming on your home SIM, the line remains active for core services like voice calls and SMS messaging.
Think of it this way: your home line is still plugged into the phone for standard phone calls (Voice) and confirmation texts (SMS). Meanwhile, your new travel eSIM acts as a separate broadband connection for everything else. All your internet-based applications use the travel eSIM’s data pipe.
This means apps you have already set up using your home number continue to work perfectly:
- WhatsApp and Telegram: These apps are tied to the phone number you registered them with. As long as your phone has any active data connection (which your travel eSIM provides), these apps function as normal, sending messages and making calls over the internet.
- iMessage and Google Messages: iMessage often remains tied to your Apple ID or your primary number. You will still get two-factor authentication codes sent via standard text message to that line, even while all other internet activity uses the travel eSIM.
- VOIP Integrations: Some providers prioritize privacy by integrating with specialized VOIP apps. For instance, AloSIM offers integration with apps like Hushed, allowing travelers to use a secondary, temporary phone number managed entirely through the eSIM’s data connection.
As of 2026, top eSIM providers for 2025 and beyond are making this coexistence even smoother with dynamic switching features. Just remember the core configuration: Keep Home SIM Data Roaming OFF, and Travel eSIM Data ON. This gives you the best of both connectivity worlds while you explore a new destination.
What to Do If Activation Takes Longer Than 5 Minutes
Most travel eSIMs activate almost instantly, but if you are staring at a “Connecting” or “Activating” screen for more than five minutes, something is likely stuck. While the technology is robust, 2026 data shows that roughly 5% to 8% of users encounter minor glitches during the initial setup. This delay is usually caused by a handshake failure between your device and the local cell tower, rather than a permanent hardware fault.
Before you delete your profile and start over, try the “Airplane Mode Reset.” Simply toggle Airplane Mode on for ten seconds and turn it back off to force your phone to re-scan for local signals. If the status remains stuck, it is time to look at specific error messages or network selection settings that might be preventing your phone from getting online.
Fixing QR Code and Installation Errors
If you receive a message stating the “Code is No Longer Valid” or “Installation Failed,” do not panic. This usually happens because the eSIM has actually already been installed, or the connection timed out during the critical download phase. Once a QR code is scanned, the unique “digital key” is tied to your device chip; attempting to scan it a second time will often trigger an error because the server thinks the code has already been used.
Check your cellular settings first to see if a generic line (often named “Business” or “Travel”) has appeared in your list of SIMs. If it is there, the installation was successful despite the error message. However, if the profile is missing, a poor Wi-Fi connection likely corrupted the download. In this scenario, you must contact your provider to reset the code. You can find more details on resolving these specific iPhone eSIM data connection errors to clear technical hurdles quickly.
Network Selection and Restart Fixes
Sometimes an eSIM installs perfectly but fails to find a signal because the “Automatic” network selection is trying to connect to a legacy tower rather than a 2026 standalone 5G network. When your phone is set to automatic, it cycles through available partners, which can sometimes result in a 10-minute wait as it “negotiates” with different carriers. You can skip this line by taking manual control of your network settings.
To fix a “No Service” status manually, follow these steps:
- Go to Settings and select your Travel eSIM line.
- Find the menu labeled Network Selection.
- Toggle Automatic to OFF.
- Wait for the list of local carriers to populate (this may take a minute).
- Select a major local carrier (like Softbank in Japan or Orange in France).
If you’ve selected a carrier and still have no data, perform a full device restart. A hard reboot clears the temporary cache and forces the eSIM to re-authenticate its credentials with the tower. For country-specific issues, such as fixing no service on Japan eSIM, checking the local carrier compatibility is often the final piece of the puzzle to getting your 5-minute activation back on track.
How to Choose the Right Travel eSIM Before You Activate
Choosing the perfect travel eSIM is just as important as the activation process itself. If you pick a plan that lacks coverage in the mountains of Switzerland or runs out of data while you are live-streaming a sunset in Santorini, your trip gets a lot more stressful. Most travelers look at the price first, but there is a layer of technical specs you need to consider to get a truly reliable connection.
Think of your eSIM as the engine for your phone’s travel experience; it needs to be compatible with both your device and the infrastructure of your destination. By 2026, network technology has moved far beyond basic 4G, and your choice should reflect the modern speeds available. You want a provider that offers more than just a connection; you want one that provides stability and speed without hidden limitations.
Matching eSIM Coverage to Your Destination
The biggest mistake you can make is assuming all “Global” or “Regional” plans are equal. When you are looking at coverage maps, specifically look for providers that offer 5G standalone support. Unlike older 5G networks that still rely on 4G infrastructure, 5G standalone (SA) is built from the ground up for speed and extremely low latency. It is the gold standard for 2026 travel, providing the best possible speeds for high-definition video calls and heavy map usage.
Confirming which local carriers the eSIM uses is a pro move. If you are heading to Japan, for example, you want an eSIM that partners with major networks like NTT Docomo or Softbank. A top-tier provider won’t hide this information; they usually list their local partners right on the product page. Knowing your phone can access multiple networks through intelligent switching is a massive win, as it ensures you don’t lose signal just because you stepped into a “dead zone” for one specific carrier.
 Photo by Joey Tran
Estimating Data Needs for Your Trip Style
Nothing kills the travel vibe faster than a “Low Data” notification when you are miles from your hotel. To avoid overpaying for data you won’t use or running out when you need it most, it’s vital to categorize your digital habits before you buy. Most people underestimate how much background data apps like Instagram or Google Maps consume when you are constantly on the move.
Here are three common trip styles to help you gauge your needs:
- The Light Browser (3GB): Best for weekend city breaks where you only need data for occasional map lookups, checking emails, and calling an Uber. This assumes you will use hotel Wi-Fi for your heavy social media scrolls at night.
- The Content Creator (10GB+): Recommended if you plan on uploading high-resolution photos and videos to social media throughout the day. This is also the sweet spot if you use GPS for hours while driving or rely on music streaming during long train rides.
- The Power User (Unlimited): For those who want zero restrictions, companies like Holafly offer unlimited data options. This is the ultimate “no-brainer” for travelers who work remotely, stream movies, or simply don’t want to track every megabyte.
If you are traveling with a partner or family, look for providers that allow data sharing. Many 2026 plans now offer “Family Pools,” letting you buy one large chunk of data that everyone can tap into. This is often far cheaper than buying individual 3GB plans for every person in your group and keeps everyone connected under one simple billing profile.
Conclusion
Setting up a travel eSIM is a simple process of scanning the QR code, naming your new line for easy identification, and toggling data roaming to ON for that specific profile. Modern 2026 technology makes connectivity instant, often working before you even step off the plane, which completely removes the stress of finding local Wi-Fi. If you want a plan that is reliable and fast, you should explore the targeted data options at gohub.com to keep your next adventure fully connected.