
eSIM Data Not Working After Activation: Step-by-Step Fixes for Travelers
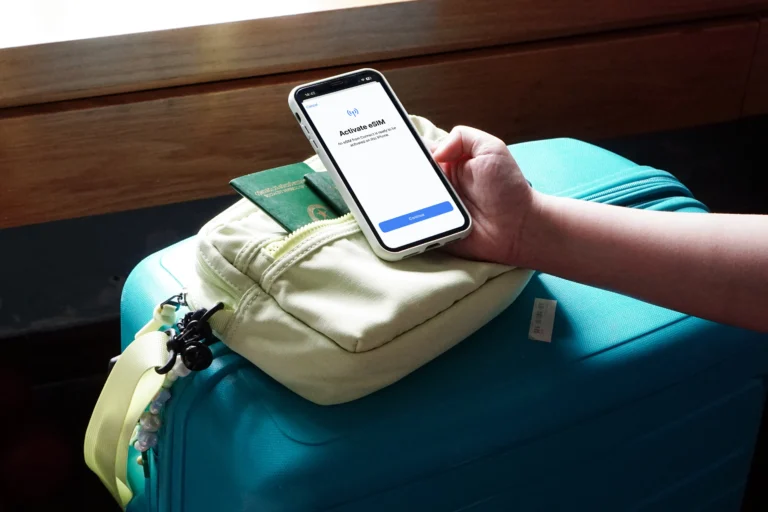
Landing in a new country only to find your phone stuck on “No Service” is a major travel buzzkill. You’ve scanned the QR code and followed the prompts; yet, the bars stay empty and Google Maps won’t load. While an eSIM (a digital version of a physical SIM card built directly into your device) is designed for convenience, technical hiccups during the initial handshake between your phone and the local network are incredibly common.
If you are dealing with eSIM data not working, the first thing you should do is restart your phone and toggle Data Roaming to “On” in your cellular settings. Most activation delays occur because the device hasn’t been forced to “look” for the new network or the roaming switch is blocking the connection.
This guide covers everything you need to get back online fast. We will walk through verifying your installation status, adjusting hidden device settings, and managing the specific network timing required for a fresh activation. By the time you finish reading, you’ll know how to fix why your travel eSIM is not working using simple toggles like Airplane Mode or APN updates. Confirm Your eSIM Is Installed and Active
Before you start digging into complex network settings or contacting customer support, you need to verify that your digital SIM actually made it onto your device. It sounds simple, but a failed download or a forgotten toggle is often the culprit behind that annoying “No Service” message. You have to treat the eSIM like a physical card; if it isn’t “plugged in” via your software settings, your phone won’t even try to talk to the local towers.
Checking eSIM Status on iPhone
Apple makes managing cellular plans fairly straightforward, though the menus can get crowded if you are a frequent traveler. To see if your plan is ready to go, head over to your Settings app and tap on Cellular. This is the command center for every line connected to your phone.
Look under the section labeled SIMs. You should see your primary home line and your new travel eSIM listed here; they are usually named something like “Travel,” “Secondary,” or the name of the provider you bought it from. Tap on the travel line to open its specific properties. The most important thing here is the toggle next to Turn On This Line. If that switch isn’t green, your eSIM is effectively invisible to the network. Flip it on, wait a few seconds for the phone to register the change, and see if those signal bars start to climb.
Checking eSIM Status on Android
On Android devices, things are just as easy to find, though the naming conventions might shift depending on whether you are rocking a Samsung Galaxy or a Google Pixel. Start by opening your Settings and navigating to Network & Internet (or Connections on some models), then select SIMs or SIM Card Manager.
Once you are in the SIM menu, your installed profiles will appear in a list. You are looking for your travel plan to be visible and labeled as active. Click on the eSIM entry and look for a switch that says Use SIM or simply an On/Off toggle. Make sure this is switched to the active position. If you see the name of the provider but the toggle is greyed out, your phone isn’t using the chip yet. If you are using a Samsung, you might also see a preferred SIM card section at the bottom; ensure your travel line is selected for mobile data specifically.
Making Sure the Correct eSIM Is Turned On
The beauty of modern phones is that they can store multiple eSIM profiles, but that’s also where the confusion starts. If you have been to three different countries this year, you might have a graveyard of old data plans sitting in your settings. Your phone can usually only handle one or two active lines at a time, so you have to be intentional about which one is pulling the weight.
Identifying the right line is a no-brainer if you label them properly. I always recommend renaming your travel line to the destination name, like “Japan Data” or “Europe Trip,” so you don’t mix it up with your home SIM. If your primary home line is still trying to handle data while you are abroad, you won’t just lack a connection; you might also get hit with massive roaming fees from your provider back home.
Go into your data settings and explicitly set your travel eSIM as the Dedicated Data Line. This tells the phone to ignore your home SIM for internet needs and focus entirely on the local travel plan. Double checking this prevents the “split personality” issue where your phone tries to fetch emails through a line that has roaming disabled while ignoring the functional travel plan sitting right next to it.
Make Sure Mobile Data Is Enabled for the eSIM
Setting up the hardware side is only half the battle; the software on your device must be explicitly told to use the new connection. Modern smartphones are incredibly smart, yet they often default to the path of least resistance, which is usually your primary home SIM card. If your device displays signal bars but refuses to load a single webpage, the logic gate for mobile data is likely pointed at the wrong source. You have to be the director here and manually assign the data workload to your travel line to ensure the cellular handshake actually results in internet access.
Selecting the eSIM for Cellular Data
Setting your travel plan as the primary data source is the most vital step in the entire configuration process. Your phone can physically see the local network, but it won’t pull any bytes until you authorize it. On an iPhone, navigate to Settings, then Cellular, and tap on Cellular Data at the very top. You will see a list of your active lines; ensure the checkmark is next to your new travel eSIM rather than your primary home number.
Android users will find this under Settings, then Network & Internet or Connections, followed by SIM Card Manager. You need to look for the “Preferred SIM” or “Data” section and toggle the selection to your eSIM. Once you make this change, your phone stops trying to reach out to towers through your home provider and focuses all its energy on the local partner network. If you neglect this, your phone is essentially trying to shout to a tower thousands of miles away while ignoring the one standing right in front of it.
Turning Off Data Switching Temporarily
Cellular Data Switching is a clever feature designed to keep you connected by jumping between lines if one signal gets weak, but it is often the reason travelers face unexpected hurdles. When this is active, your phone might get “confused” and try to revert to your primary home SIM if the local eSIM signal flickers for a second. Since your home SIM is likely blocking data to save you from roaming charges, your internet will simply cut out instead of staying on the functional travel line.
Go into your cellular data settings and flip the switch for “Allow Cellular Data Switching” to the off position. By disabling this, you are forcing the device to stay loyal to the travel eSIM no matter what. This prevents the phone from “failing over” to a non-functional primary line that has no data access abroad. It’s a simple way to eliminate a variable that frequently causes intermittent connection drops or a total fix for PDP authentication failure on eSIM where the network handshake gets scrambled by the line swapping.
Checking Low Data and Data Limit Settings
Even with the correct line selected, background software restrictions can act as a silent barrier to your connection. Most devices include a “Low Data Mode” or “Data Saver” feature intended to preserve your allowance by stopping apps from syncing or updating. While useful at home, these settings can be overly aggressive when you are relying on a travel eSIM, sometimes preventing apps like Google Maps or WhatsApp from refreshing even when you have a perfectly stable signal.
To ensure your apps can actually talk to the internet, follow these steps:
- For iPhone Users: Open Settings, tap Cellular, select your eSIM line, and ensure “Low Data Mode” is toggled off.
- For Android Users: Navigate to Settings, then Connections or Network, and look for “Data Usage.” Ensure “Data Saver” is disabled.
- Check Individual App Limits: Some devices allow you to set a “Data Limit” that hard-stops the connection once a certain threshold is hit; ensure this isn’t set too low for your travel needs.
Disabling these restrictive modes ensures that every app on your phone has full permission to use the data you just purchased. It is much better to burn through a little extra data than to spend your afternoon standing on a street corner wondering why your navigation app won’t give you directions.
Check Network Selection and Signal
If your device is sitting on “No Service” despite having the eSIM active and roaming switched on, the issue usually boils down to the network handshake. Your phone is trying to decide which local tower to talk to, but it might be picking a partner that doesn’t actually support your specific data plan. By taking control of the network selection and understanding the visual cues on your status bar, you can push the connection through manually.
Automatic Versus Manual Network Selection
By default, every modern smartphone is set to Automatic network selection. This is generally the best way to go because it allows your phone to hop between towers to find the strongest signal. However, if your eSIM provider has a specific roaming agreement with Carrier A, but your phone keeps trying to latch onto Carrier B because its signal is slightly stronger, you will end up with a dead connection.
Switching to manual mode allows you to bypass the phone’s “best signal” logic and force it onto the specific carrier that supports your eSIM. To do this on an iPhone, go to Settings, then Cellular, select your eSIM, and tap Network Selection. On Android, navigate to Settings, then Connections or Mobile Network, and look for Operator or Network Operators. Toggle off the Automatic switch, wait about a minute for a list of available local carriers to populate, and then select the one recommended by your eSIM provider. This is a classic manual network selection for Japan eSIM fix that works for almost any destination when the automatic system gets stuck.
What to Do If There Is No Signal
Finding yourself in a “dead zone” is frustrating, but it isn’t always a permanent state. Physical barriers are the most common enemies of a successful initial handshake. If you are deep inside an airport terminal, in a basement hotel lobby, or surrounded by thick concrete walls, your phone might struggle to grab the initial registration signal from the local tower.
The initial activation of a travel eSIM requires a bit more “effort” from the device than a standard connection. To clear this hurdle, try moving to a different environment. Head toward a large window, move to a higher floor, or step outside into an open area. This reduces interference and gives the device a clear line of sight to the cell towers. Once that initial connection is made and the “handshake” is complete, your phone will generally be much better at maintaining the signal even when you move back indoors.
Understanding LTE 4G and 5G Icons
It is a common misconception that signal bars equal data access. Those bars represent your phone’s connection to the cellular tower for basic signaling, but the data icons (like LTE, 4G, or 5G) tell the real story of your internet provisioning. If you see four bars of signal but no data icon next to them, your phone has successfully found a tower, but the tower is refusing to let you browse the web.
When the LTE or 5G icons are missing, it typically means one of three things:
- Authentication Issues: The local network doesn’t recognize your eSIM as a valid data subscriber.
- Provisioning Delay: The network is still processing your activation, which can take up to 15 minutes after landing.
- APN Mismatch: Your phone is trying to talk to the internet using the wrong “address.”
If you have signal bars but no data icon, try toggling Airplane Mode on and off to refresh the session. If the bars return but the data icon remains missing, you likely need to check your APN settings or wait a few more minutes for the carrier to authorize your data session. If things still aren’t moving after twenty minutes, it might be time to look into the Gohub technical support and replacement options to see if there is an issue with the eSIM profile itself.
Toggle Airplane Mode and Restart the Phone
It is easy to get bogged down in deep technical menus, but sometimes the most effective solution is the oldest one in the book. If your phone shows signal bars but won’t pull any data, or if it is stuck on “Searching,” you need to force the device to stop what it is doing and try again from scratch. Toggling Airplane Mode or performing a quick restart acts as a hard reset for the cellular radio, clearing out any digital cobwebs that might be blocking your eSIM from talking to the local towers.
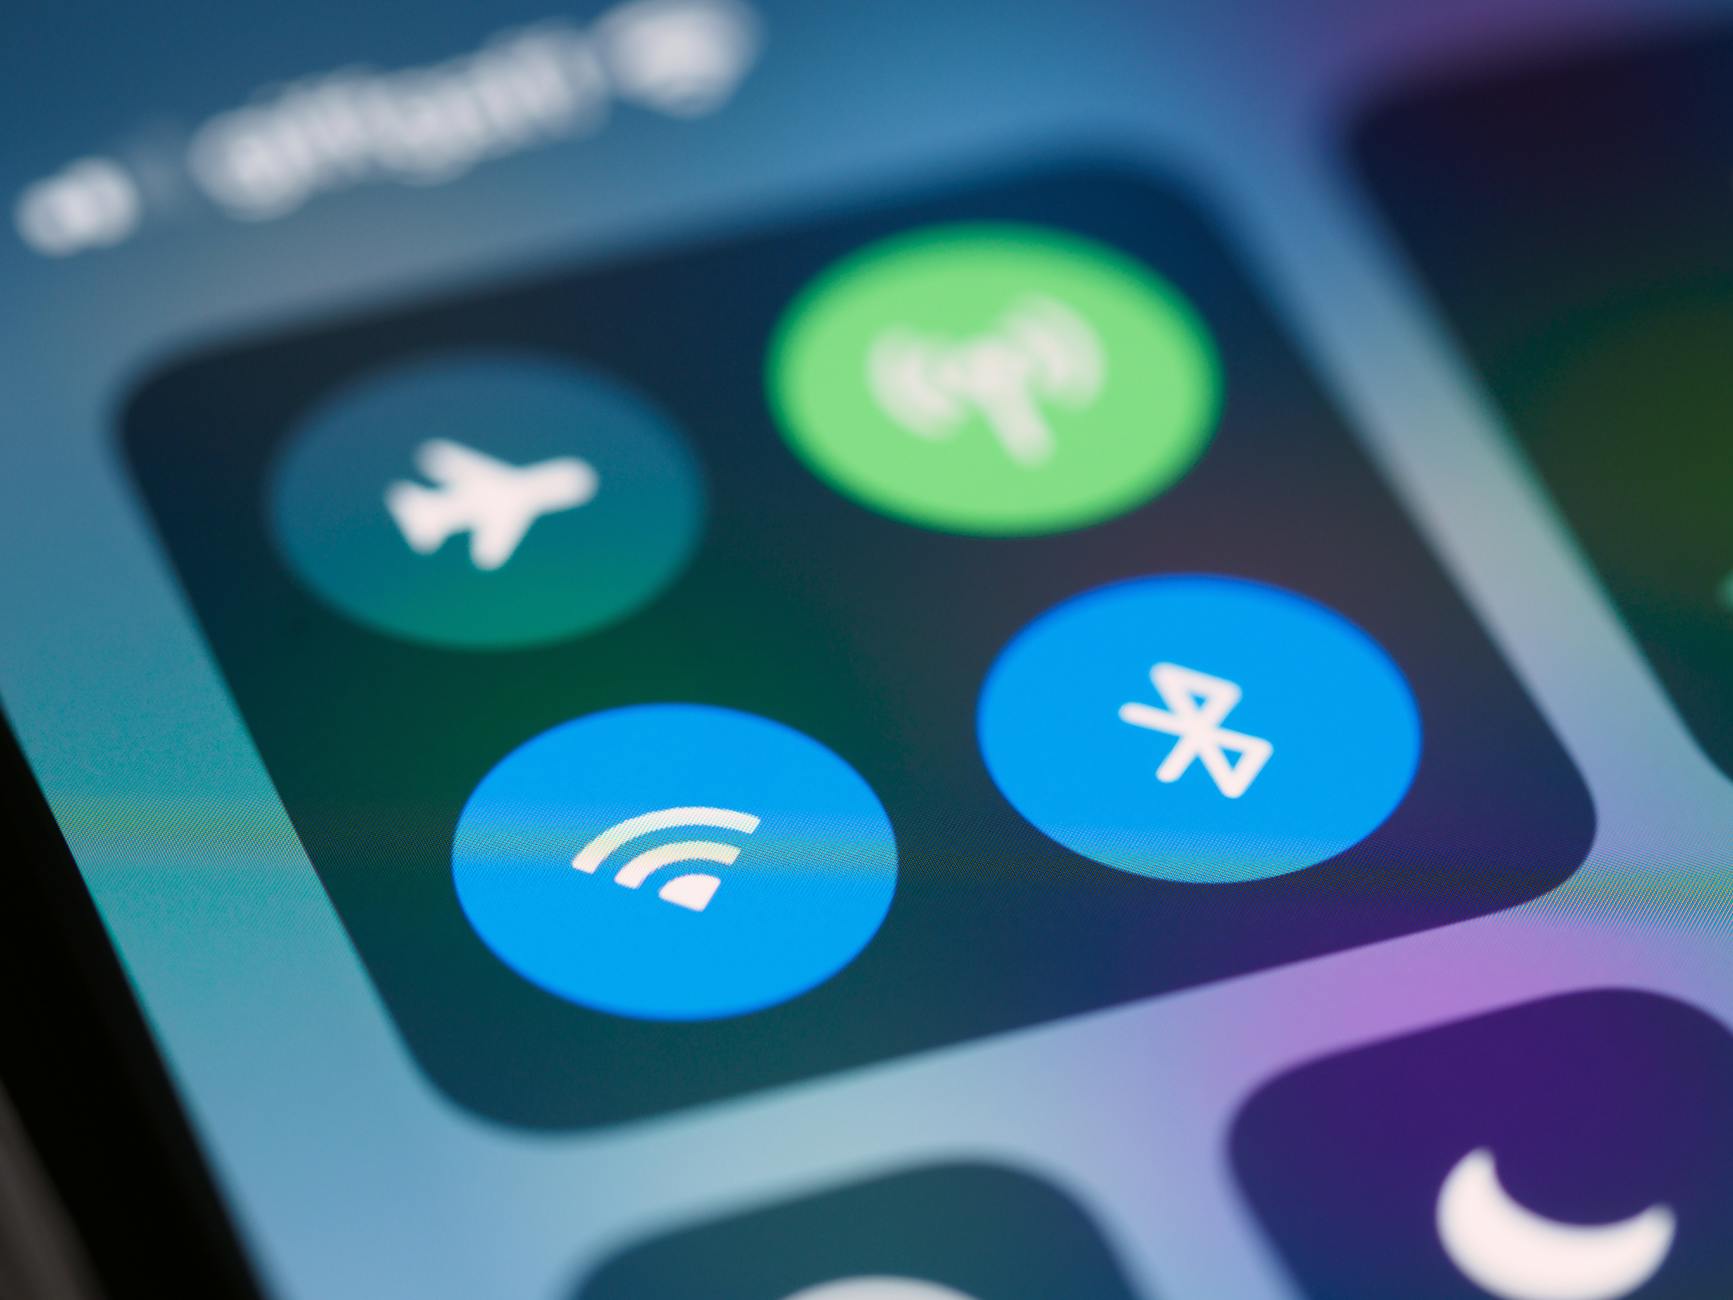 Photo by Brett Jordan
Why This Fix Often Works
When you land in a new country, your phone’s cellular radio is basically trying to shout into a crowded room to find a specific friend. Sometimes, it gets focused on a tower that is too far away or a network that is incompatible with your travel plan, leading to a “stuck” connection state. By switching on Airplane Mode, you are essentially telling the radio to go silent for a moment.
Turning the radio back off forces the device to perform a fresh, active search for the closest and most compatible cell tower. This fresh handshake often clears minor software glitches that occur during the initial transition between your home network and your travel destination. It is a simple way to nudge the phone’s internal logic into recognizing the new eSIM profile and the local roaming partner’s parameters.
The Correct Order to Reset the Connection
Timing is everything when you are trying to reset a network handshake. You don’t want to just flick the switch and immediately flick it back; the hardware needs a moment to actually power down and clear its temporary cache. Follow this specific sequence to ensure the reset actually takes hold:
- Toggle Airplane Mode: Turn Airplane Mode on and wait for at least 15 seconds. This ensures all cellular, Wi-Fi, and Bluetooth radios have fully disconnected from their respective networks.
- Turn it Off: Toggle Airplane Mode back to the off position and watch the top corner of your screen. Give the phone about 30 seconds to find its bearings.
- Perform a Full Restart: If the bars still don’t appear, do a full power cycle. Turn your phone completely off, wait 10 seconds, and then turn it back on.
- The Two-Minute Rule: After your phone boots back up, do not touch it. It can take up to 2 minutes for the cellular modem to scan all available frequencies and complete the secure registration with the local carrier.
If you are still seeing “No Service” after these steps, the problem is likely deeper than a simple radio glitch. At this point, you should verify if your device is actually unlocked or if you need to manually input specific network settings. If you find that the profile refuses to load at all, you might be dealing with a problem where the eSIM cannot be added due to server timeouts or QR code errors.
Verify APN Settings Only If Needed
If your device shows signal bars but refuses to load any data, the issue often stems from an incorrect Access Point Name (APN), which is essentially the gateway address your phone uses to connect to the internet. Most modern eSIM profiles act as “plug and play” products that automatically configure these settings the moment they register with a local tower. However, automated systems can fail, especially when hopping between regional carriers with different network protocols.
Manually adjusting your APN is a precision fix that should be your final step before contacting support. It is a powerful tool because it manually points your device to the correct data highway, but even a single typo in the APN field will leave you completely disconnected. You should treat these settings as a digital map; if the coordinates are slightly off, your phone will never find the network’s data server.
When APN Settings Matter
While we have moved toward a more automated world in 2026, manual entry remains a common requirement for specific regional carriers and boutique travel eSIM providers. Many global providers now use universal gateways to simplify the user experience, but you may still encounter situations where the automated “handshake” fails to deliver the correct address to your device’s cellular modem.
If you are traveling through Asia or Europe, you will find that many networks require specific APNs to authorize roaming data. Common manual entries you might encounter include:
- Global Standard:
globaldataorinternet - Asia/Europe Region:
wbdata - Japan Specific:
plus.4g - Thailand Specific:
aisapn
Local carriers often have their own proprietary APN strings that your international eSIM must use to gain access to their local infrastructure. If you’ve followed all other troubleshooting steps (like enabling roaming and restarting) and still have no data icon, this is when the APN settings truly matter. You are effectively providing the “password” the local network needs to let your data traffic through.
What to Check Without Changing Defaults
Before you start typing into the technical fields of your phone, you must verify that a manual change is actually requested by your provider. Most eSIM failures are caused by basic toggles rather than deep network settings. Altering these fields without a specific instruction from your eSIM provider can lead to a total loss of connectivity that is difficult to reverse without a full network reset.
Always check your provider’s installation email or app for a section labeled “APN Settings” before making any edits. If their instructions state the APN is “Set Automatically,” do not touch these menus. If you do need to enter information, only fill out the APN Name field unless specifically told otherwise.
| Field Name | Action for Most Travel eSIMs |
|---|---|
| APN | Enter the provided string (e.g., globaldata) |
| Username | Leave blank unless specified |
| Password | Leave blank unless specified |
| APN Type | Set to default or default,supl |
| APN Protocol | Ensure it is set to IPv4/IPv6 |
Changing values like the MMSC or Proxy without a guide can break your phone’s ability to send messages or use specific apps. If you find yourself lost in these menus, it is helpful to consult general eSIM FAQs and troubleshooting to understand the baseline settings for your device. Always take a screenshot of the original settings before you change them so you can easily revert to the default state if the manual fix doesn’t work.
Confirm You Are in a Covered Country or Region
Before you start resetting your network settings or getting frustrated with your device, you need to verify that your current location matches the service area of your plan. It sounds obvious, but I have seen many travelers assume a “Europe” plan covers every corner of the continent, only to find out it excludes specific regions like Switzerland or Turkey. If you are standing outside the geographic boundaries of your provider’s network agreements, your phone will simply refuse to connect, regardless of how many times you restart it.
Coverage Versus Roaming Expectations
The most common reason for a “No Service” status is a simple misunderstanding of how data roaming works. For almost every travel eSIM on the market, you must turn Data Roaming ON in your device settings. I know this feels terrifying for some because we have spent years being told that roaming leads to a thousand-dollar bill. However, when you are using an eSIM, the “roaming” switch is just the permission the phone needs to talk to a local network that isn’t its “home” provider.
Turning this switch on does not charge your home SIM card as long as you have disabled it for data or turned off “Cellular Data Switching.” Think of it as opening a gate; if the gate is locked, the travel eSIM cannot reach out to the local towers to fetch your data. If you skip this, your phone will stay in a dormant state even if the signal is perfect. It is also a good idea to check eSIM activation timeframes to see if your plan has actually started its service window yet.
Border Areas and Weak Signal Zones
If you are traveling by train or car near a national border, your connection might suddenly drop out despite being in a covered country. This happens because cell signals do not respect political lines. Your phone always wants the strongest signal possible, so it might “jump” to a tower across the border that belongs to a country not included in your data plan.
When this happens, your phone stays connected to a tower, but the network rejects your data request because your eSIM isn’t authorized for that specific territory. To fix this, you should try two quick things:
- Use Manual Selection: Go into your network settings and lock your phone to a carrier that belongs to the country you are actually in.
- Toggle Airplane Mode: This forces the phone to dump its current connection and find the nearest authorized tower.
This is especially common in clusters like the BENELUX region (Belgium, Netherlands, Luxembourg) or when traveling near the borders of non-EU countries. If you are on the edge of a covered zone, your device might try to be “too smart” for its own good by chasing a strong but unusable signal from a neighboring nation. Holding your ground and manually selecting your preferred network ensures you stay connected to the plan you actually paid for.
Rule Out Device and OS Issues
Sometimes the problem isn’t the network or the eSIM itself, but the physical device in your hand. Modern smartphones are basically pocket computers with complex operating systems that try to be too smart for their own good. If your phone is running behind on its software or fighting against a background security profile, it can effectively put a digital lock on your new data plan. Taking a few minutes to look under the hood of your device settings can resolve these invisible roadblocks that stop a perfectly good eSIM from connecting.
Software Updates That Affect eSIMs
If your eSIM is being stubborn, you should check if your phone’s operating system is current. Manufacturers regularly release patches that fix bugs specifically related to cellular modem performance and roaming protocols. While major OS updates get all the attention, carrier settings updates are just as important; these are small bundles of data that tell your phone how to talk to new global networks.
Updating your device before you leave for a trip is the best move, but you can still run a quick check after you land if you have access to airport Wi-Fi. On most phones, you can trigger a check for these carrier-specific updates by going to your About settings. If a prompt pops up asking to update carrier settings, accept it immediately. This refresh can provide the specific “handshake” instructions your phone needs to recognize a foreign partner network that didn’t exist when you first bought the phone.
VPNs and Profiles That Can Block Data
A very common but overlooked cause of data failure is the presence of active VPNs or corporate management profiles. If you use a VPN for security or to watch your favorite shows from home, it might be trying to route all your traffic through a server that the local carrier finds suspicious. In some cases, the VPN will keep trying to establish a secure tunnel over an inactive connection, which prevents the eSIM from completing its initial registration with the local tower.
Management (MDM) profiles are a different beast entirely. If your phone is a company-issued device, your IT department might have installed a security profile that restricts the use of secondary SIM cards or limits data roaming to specific approved providers. To test if these are the culprit, try the following steps:
- Turn off your VPN: Go into your VPN app or your device’s network settings and disconnect any active sessions.
- Check for MDM Profiles: On an iPhone, go to Settings, then General, and look for VPN & Device Management. On Android, check under Security or Work Profile.
- Toggle Private Relay: If you are using an iPhone, temporarily disable iCloud Private Relay in your iCloud settings, as this sometimes conflicts with how local networks assign IP addresses to travelers.
By clearing these background filters, you allow the data to flow directly between the tower and your phone without a digital middleman getting in the way. Once you have a stable local connection and everything is working, you can usually turn your VPN back on to stay secure while you browse.
Test Data With Simple Actions
Testing your connection is the first thing you should do after toggling your settings. It’s tempting to open Instagram or YouTube to see if you have data; yet, high-bandwidth apps are terrible diagnostic tools. These platforms often use heavy caching, meaning you see images from ten minutes ago while your actual connection is dead. You need a clean, immediate way to prove your device is talking to the local network.
Loading a Lightweight Website
Open a simple, lean webpage like google.com or example.com to verify your data flow. Browsing to a lightweight site is the gold standard for testing because these pages require very little data to load. If the Google search bar appears instantly, your eSIM has passed the basic handshake. If it hangs on a white screen, you know the pipe is clogged.
Using a heavy app for this test is a mistake. Netflix or TikTok will try to pull massive amounts of data immediately, which can cause a fresh, low-priority travel connection to time out before it even gets started. Stick to a basic browser tab. If you can search for “current time in London,” and the result pops up, your eSIM is officially alive.
Using a Messaging App Without WiFi
Turn off your WiFi completely to confirm the eSIM is handling your messaging traffic. It is easy to think you’ve fixed the problem when a WhatsApp message sends, only to realize your phone was still clinging to the weak airport WiFi. Disabling WiFi forces the phone to use the cellular path exclusively.
 Photo by Brett Jordan
Once the WiFi icon is gone, try these specific steps:
- Send a text-only message: Fire off a quick “I’ve landed” to a friend. Text uses almost zero data and is the easiest thing for a network to process.
- Check for the “Delivered” checkmark: If the message goes through, you have an active upload and download path.
- Refrain from sending photos yet: Stick to text for the first sixty seconds to let the network stabilize.
Messaging apps like WhatsApp or iMessage are perfect for this because they provide clear visual feedback on whether a packet has left your device. If the clock icon stays on your message for more than ten seconds while WiFi is off, your data is still restricted. This simple test isolates the cellular radio from any home or hotel network caching, giving you an honest look at your current connectivity status.
Is It Normal for Data to Take Time After Activation
I have been there; you arrive at your destination, toggle your settings, and then… nothing happens for a few agonizing minutes. It’s incredibly tempting to assume something is broken right away, but in the world of cellular technology, a “handshake” between your device and a foreign network isn’t always instantaneous. There is a very real technical process where the local carrier has to verify your digital credentials, allocate bandwidth, and register your device on their towers. Understanding the difference between a standard delay and a genuine technical failure will save you from a lot of unnecessary stress at the arrivals hall.
Typical Activation Delays to Expect
The speed at which you get online depends heavily on the type of provider you are using. Travel-specific apps are built for speed, whereas local carriers often have bureaucratic hurdles that slow things down. If you are using a major home carrier with an international roaming pass, the transition is usually the fastest because your device is already authenticated on their core network.
However, if you are porting a number or using a local registration system, you might be waiting longer than you’d like. For travelers buying local eSIMs in regions with strict identity laws, the verification of your passport can add a significant buffer to your wait time.
| Provider Type | Setup Effort | Activation Speed |
|---|---|---|
| Travel Apps | Low (DIY) | ~1 Minute |
| Big Carriers | Very Low | 5-10 Minutes |
| Local Carriers | Medium (Paperwork) | 15 Minutes to 2 Hours |
In fact, porting a phone number to an eSIM line can occasionally take up to two hours to fully propagate through global switching systems. If you have just landed and it has only been five minutes, give it a little more time before you start worrying about the effects of deleting an eSIM profile and starting over.
Common Mistakes That Prevent Data From Working
If you’ve waited past the typical activation window and you’re still staring at a “No Service” message, it’s likely a configuration error rather than a network delay. One of the most frequent blunders I see involves the IMEI (International Mobile Equipment Identity) number. Most modern dual-SIM phones have two: IMEI 1 for your physical slot and IMEI 2 for your eSIM. If you provided the wrong one to your carrier during a manual registration, the network will keep trying to send data to a “slot” that isn’t actually holding the eSIM profile.
Another common pitfall is attempting to activate your plan while relying on flaky, overcrowded airport WiFi. The activation process requires a stable, consistent exchange of data packets to download the “keys” to the network. If the WiFi drops for even a second during this handshake, the profile might download but fail to register.
Be sure to check these common blockers before you dive deeper into troubleshooting:
- Carrier Locks: If your phone isn’t fully paid off or was bought on a contract, it might be “locked” to your home provider, preventing any other SIM from connecting.
- Weak WiFi: Using a slow or public hotspot to install a profile often leads to corrupted installations or authentication timeouts.
- The Wrong IMEI: Double check that you registered the eSIM using IMEI 2 (or the designated digital slot) in your phone’s “About” settings.
If your device is carrier-locked, no amount of restarting or APN tweaking will fix the issue; you’ll need to contact your original provider to request an unlock. It’s a total buzzkill, but identifying this early prevents you from wasting hours on fixes that can’t possibly work. If everything looks correct on the hardware side but the profile is still acting up, it might be a remnant of a previous installation, and you may need to look into how to clear stuck eSIM profiles to give your device a fresh start.
Conclusion
Most travel eSIM data failures resolve immediately once you toggle Data Roaming to the on position or perform a complete device restart to refresh the network handshake. If these primary local fixes do not restore your connection, reaching out to your carrier support with your device’s specific IMEI and ICCID information is the most effective next step.
For more detailed troubleshooting tips and advanced connectivity walkthroughs, be sure to explore the extensive library of guides at gohub.com to keep your travels focused on the journey rather than the settings menu. Stay connected and enjoy the peace of mind that comes with reliable mobile data wherever you land.