QR Code eSIM Setup Guide (iPhone + Android)
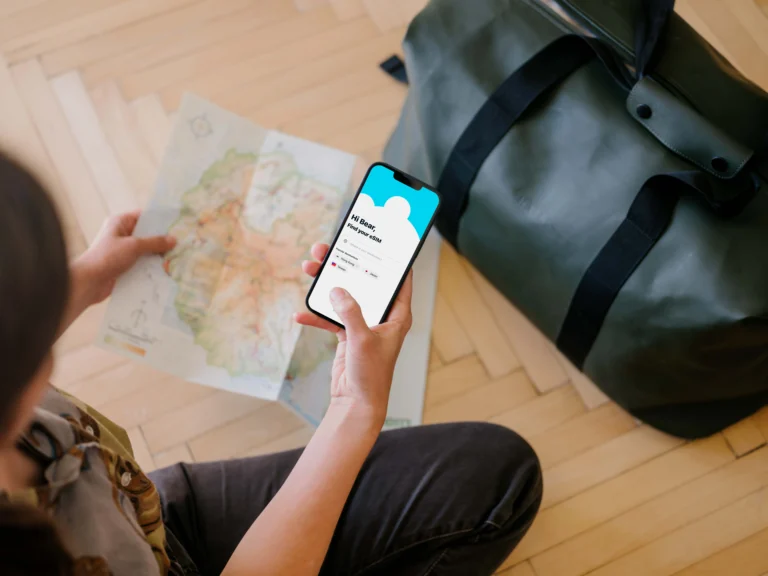
A QR code eSIM is a digital version of a traditional SIM card that is embedded directly into your phone’s hardware, allowing you to activate a mobile data plan by simply scanning a unique code. This technology eliminates the need to hunt for local kiosks or fiddle with tiny plastic cards while traveling, making it a staple for anyone who values efficiency and instant access to the web. By using a digital profile, you can avoid the stress of physical SIM swaps and the risk of losing your primary card while overseas.
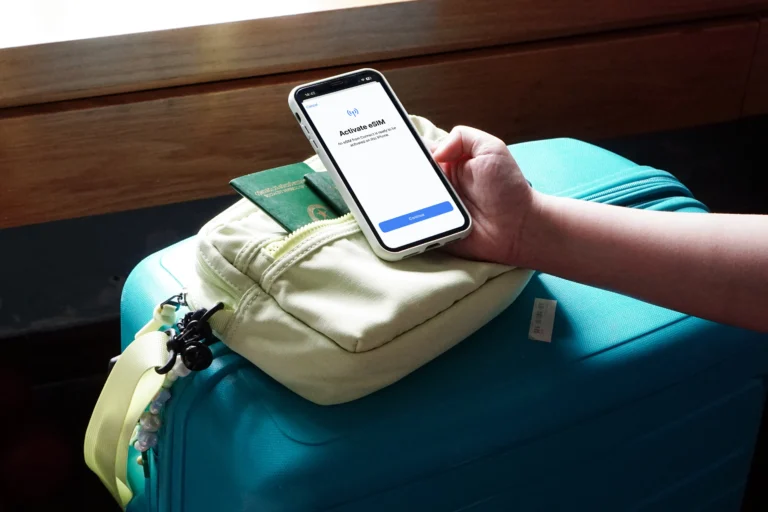
The setup process is remarkably straightforward for both iOS and Android users. On an iPhone, you typically navigate to “Cellular” in your settings, select “Add eSIM,” and scan your provided QR code to begin the installation. Android users follow a similar path through “Connections” and the “SIM Manager” menu. This step-by-step eSIM installation guide provides a clear walkthrough for both operating systems to ensure you are connected the moment your plane touches the tarmac.
One of the biggest advantages of this technology is the ability to enjoy instant connectivity without the dreaded “sticker shock” of international roaming fees. Because you can install the profile before you even leave home, you gain immediate access to maps and translation apps upon arrival. This guide will walk you through verifying your device’s compatibility, the nuances of the scanning process, and how to manage your data settings to maintain a reliable connection throughout your trip.
Understanding the QR Code eSIM and Why It Is the New Standard
A QR code eSIM is a digital profile that allows you to activate a cellular data plan without ever touching a physical piece of plastic. This technology works by downloading an encrypted file containing your carrier credentials directly onto a permanent chip inside your handset; once this file is installed, your device communicates with the network exactly like it would with a traditional SIM. Because this system relies on software rather than hardware swaps, it has rapidly become the gold standard for travelers who need to jump between local networks across the globe.
By 2026, the shift toward digital-only connectivity is expected to result in the total removal of SIM trays from most flagship smartphones. Leading manufacturers like Apple and Samsung are already prioritizing eSIM architecture to save internal space for larger batteries and advanced 5G hardware. This evolution means that the humble QR code is no longer just a gimmick; it is the primary bridge connecting your physical device to a global web of mobile networks.
The Evolution from Plastic to Digital
For decades, the only way to change your phone service was to use a small metal tool to eject a tray and insert a tiny chip. This process was famously cumbersome, especially when standing in a crowded airport after a long flight, trying not to lose your primary home SIM while fumbling with a local one. The transition to the QR code model removes all these physical failure points, providing a more robust and secure way to manage your mobile identity.
Unlike physical cards that can be damaged, lost, or even stolen to gain access to your accounts, an eSIM is soldered onto the motherboard. If your phone is stolen, a thief cannot simply remove the SIM to prevent it from being tracked; the digital profile remains locked to the hardware. This security benefit, combined with the sheer convenience of not having to find a brick-and-mortar store to buy a plan, makes the guide to installing travel eSIMs an essential resource for the modern adventurer.
Why QR Codes are the Preferred Activation Method
While some carriers allow you to activate a plan through a proprietary app, the QR code remains the most universal and reliable method for provisioning an eSIM. When you buy a plan, you receive a unique matrix barcode that contains a set of instructions for your phone. When the camera detects this code, it triggers a handshake with the carrier’s server, which then sends the necessary data to “burn” the profile onto your chip.
This method is incredibly efficient because it works across different operating systems and languages without requiring a complex user interface. It is a “scan it and forget it” solution that ensures you don’t have to type in long strings of activation codes or SM-DP+ addresses manually. For those who frequently move between regions, knowing how to switch between multiple eSIM plans is just as important as the initial scan, as modern phones can now store several profiles at once.
Key Advantages of Digital-First Connectivity
The shift toward the eSIM standard offers several practical benefits that go beyond just avoiding the SIM tray tool. Here are the main reasons why this technology is taking over the industry:
- Dual SIM functionality: You can keep your primary home number active for important texts and calls while using the eSIM data for maps and browsing.
- Multiple profiles: Most modern devices allow you to store anywhere from five to ten different eSIM profiles, making it easy to get an eSIM in minutes whenever you enter a new country.
- Improved durability: With no SIM slot, phones can be sealed more effectively against water and dust, leading to better IP ratings and longer device lifespans.
- Environmental impact: Eliminating millions of plastic cards and their packaging significantly reduces the carbon footprint of the telecommunications industry.
These advantages are why the QR code eSIM is now the default choice for global roaming. It’s faster, safer, and much more flexible than the old way of doing things. Whether you are a weekend traveler or a frequent flyer, the ability to scan a code and get online instantly is a massive upgrade to the overall user experience.
Essential Requirements Before You Scan Your eSIM QR Code
Before you point your camera at that black-and-white matrix, your device needs to be in a specific state of readiness. Most setup failures happen not because the QR code is broken, but because the hardware or software isn’t prepared for the handshake. Think of the QR code as a digital key; if the door’s lock is jammed or the hinges are rusty, the key won’t turn. To ensure you connect to a new network in seconds, you must verify a few non-negotiable prerequisites.
Device Compatibility and Hardware Readiness
The most fundamental requirement is a device that actually houses an eSIM chip. While most flagship phones released after 2018 include this hardware, many budget models or regional variants still rely exclusively on physical slots. For instance, if you are looking into configuring digital SIMs on the latest iPhone, you are likely safe, but older or region-specific models require a quick verification.
A foolproof way to check for an embedded chip is to open your phone app and dial *#06#. This command brings up your device information. If you see an “EID” number listed among the IMEI codes, your phone has the necessary hardware to support an eSIM. If no EID appears, your phone lacks the internal chip, and scanning a QR code will simply result in a “No SIM Card” error.
The Carrier Network Lock Barrier
Even if your phone is brand new, it might be software-locked to your home provider. This is the single most common reason travelers encounter errors during the activation process. If you purchased your phone through a subsidized monthly plan from a carrier like AT&T or Vodafone, they often restrict the device so it can only communicate with their specific towers.
- iPhone check: Navigate to Settings, then General, and tap About. Scroll down to Carrier Lock. It must say “No SIM restrictions” for a travel eSIM to function.
- Android check: Go to Settings, then Connections, and look for Mobile Networks. If the option to “Choose Network” or “Add SIM” is greyed out, your device is likely locked.
- The Solution: You must contact your home carrier and request an unlock. Most will do this for free once the device is paid off, but it can take 24 to 48 hours to process, so do this before you head to the airport.
Stable Connectivity for the Download
It’s a common misconception that the QR code contains the entire SIM profile. In reality, that code is just a secure pointer that tells your phone where to go on the internet to download the actual data. Because of this, you cannot activate an eSIM using only your phone’s existing cellular data. You need a stable Wi-Fi connection to bridge the gap while the new profile installs.
If your Wi-Fi signal drops or flickers during the download, the installation may fail midway. In some cases, a partial installation can burn the single-use QR code, making it invalid for a second attempt. Always ensure you are on a private, reliable network rather than a spotty public airport Wi-Fi when you begin the process. If you are still curious about the technical side, reading a detailed guide to embedded SIM technology can help you understand why this internet handshake is so vital.
Final Software and Setting Checks
Once you’ve confirmed the hardware and the network status, a quick audit of your settings prevents minor glitches. Make sure your operating system is up to date; many eSIM bugs are patched in routine iOS and Android updates. If you’re using a company-issued phone, check with your IT department to ensure they haven’t placed a restriction on “Cellular Plan Changes” via a management profile.
One practical tip: if you are scanning the code from another screen, like a laptop or tablet, turn the brightness up to 100%. If the screen is too dim or has a heavy blue-light filter active, your phone’s camera might struggle to resolve the tiny pixels of the code. A clear, bright image is usually the final piece of the puzzle for an instant, successful connection.
Step By Step Guide to Installing an eSIM on iPhone
Setting up an eSIM on your iPhone is a straightforward process that eliminates the need for physical tools and tiny cards. Modern iOS versions are designed to make this transition as fluid as possible, allowing you to go from scanning a code to browsing the web in about a minute. Whether you are using a travel plan for a vacation or adding a second line for work, the “scan and activate” workflow is the fastest way to get connected.
Step 1 Prepare Your Device for Installation
Before you initiate the setup, ensure your iPhone is connected to a stable Wi-Fi network. The QR code provided by your carrier is not a data package itself; it is a digital key that triggers a download from the carrier’s servers. If your internet connection drops during this download, the installation might fail, and some QR codes are single use only.
Verify that your device is running the latest version of iOS. Apple frequently releases updates that improve eSIM stability and network compatibility. To check this, go to Settings, then General, and tap Software Update. Having the most recent software ensures that the “Add eSIM” interface is fully optimized and free of known bugs.
Step 2 Scan the QR Code
The most common way to install a profile is via the iPhone camera. You do not need a special app; the standard camera app is smart enough to recognize the eSIM data embedded in the matrix.
- Open the Camera app: Point it at the QR code shown on your computer screen or printed email.
- Tap the Notification: A yellow “Cellular Plan Detected” banner appears at the top of your screen; tap it to open the setup wizard.
- Continue the Setup: Tap the blue “Continue” button once the “Install Cellular Plan” screen appears.
- Add Cellular Plan: Tap “Add Cellular Plan” at the bottom of the screen to start the download.
If you are unable to scan the code; for example, if the code is saved as a photo on the same phone you are using; you can enter the details manually. Navigate to Settings > Cellular > Add eSIM, then tap “Use QR Code.” At the bottom of that scanning screen, select “Enter Details Manually” and type in the SM-DP+ Address and Activation Code provided by your vendor.
Step 3 Label and Configure Your Lines
Once the profile is installed, your iPhone asks you to label your new plan. This is a critical step for staying organized, especially if you have multiple travel plans stored at once. You can choose from default labels like “Travel,” “Business,” or “Secondary,” or create a custom name like “Vietnam Trip.”
After labeling, you must decide how the phone handles calls and data. Your iPhone will ask which line should be the “Default Line” for voice calls and iMessage. For most travelers, it is best to keep your primary home number as the default for iMessage and FaceTime to stay reachable by friends. However, you should set the new eSIM as the dedicated line for “Cellular Data” to ensure your apps use the local travel plan instead of expensive home roaming.
Step 4 Active Data Roaming and Final Verification
For the eSIM to actually connect to a network in a foreign country, you must enable Data Roaming in your settings. This tells your iPhone it is okay to use the local partner networks.
- Go to Settings.
- Tap Cellular (or Mobile Data).
- Select your new eSIM profile.
- Toggle Data Roaming to the On position.
Many users find understanding how eSIMs work helpful at this stage to avoid anxiety about roaming charges. Remember, as long as you only turn on roaming for the eSIM and keep it off for your primary home SIM, you will not be charged by your home carrier. Once these steps are finished, you should see the signal bars for the new network in the top corner of your screen.
How To Activate a QR Code eSIM on Android Devices
Activating a QR code eSIM on your Android phone is an incredibly efficient way to gain mobile access, especially when you are hopping between countries or just want a secondary line without the bulk of a physical card. While the process usually takes less than two minutes, the specific menus can vary slightly depending on whether you are using a Samsung Galaxy, a Google Pixel, or another brand. The digital profile is essentially a specialized file that your phone downloads onto its permanent internal chip, and the QR code serves as the secure link to that specific carrier handshake.
Finding the eSIM Manager in Android Settings
To start the installation, you need to find where your phone stores its SIM management tools. Because Android is an open platform, different manufacturers like Samsung and Google organize their menus in different ways. You aren’t looking for a standalone app; instead, you are diving into the core communication settings of your operating system.
On most modern Android devices, including those from Google or OnePlus, you navigate to Settings and then select Network & Internet. From there, you look for a plus sign (+) next to SIMs or a direct link that says Download a SIM instead. If you are using a Samsung device, the path is usually Settings, then Connections, followed by SIM Manager. Once you reach this screen, you see an option to Add eSIM. Tapping this button wakes up your camera, signaling the device that it is ready to receive a new digital profile.
Scanning the QR Code and Downloading the Profile
Once your camera interface is active, you need to point it at the QR code provided by your carrier. It is an absolute requirement to have a stable Wi-Fi connection during this part of the process. The QR code does not contain the actual data plan; it contains an address that tells your phone where to go to download the encrypted eSIM file. If your Wi-Fi flickers or drops, the installation can fail, and since most QR codes are for one-time use, you may have to request a replacement.
I recommend displaying the QR code on a second screen, such as a laptop or a tablet, and turning the brightness up high. Hold your Android phone steady and align the code within the on-screen box. If the camera lens is smudged or the room is too dark, the scanner might struggle. If the scan fails repeatedly, look for a small link at the bottom of the screen labeled Enter code manually. This allows you to type in the SM-DP+ Address and Activation Code provided by your vendor, which serves as a foolproof backup.
Configuring Your Lines for International Use
After the download finishes, your phone will ask you to name the new line. I strongly suggest using a clear, descriptive label like “Travel Data” or “Germany Plan” so you don’t confuse it with your main number later. This is particularly helpful when you are toggling settings in a crowded airport and need to make quick decisions.
You must then tell Android how to use this new connection. Your phone will usually ask which line it should use for calls and which it should use for data. If you are traveling, the most effective setup is to keep your primary physical SIM for Calls and SMS so friends can still reach you on your home number, while selecting the new eSIM for Mobile Data. This prevents your phone from using expensive roaming data on your home plan while allowing you to use local-rate data for maps and apps.
Final Activation Steps and Roaming Settings
Even after the eSIM is installed and named, it might not provide internet access immediately until one final setting is toggled. You must ensure that Data Roaming is turned ON within the settings of the new eSIM profile. Since you are using a travel-specific plan, roaming is a requirement for it to connect to the various local networks in your destination country.
Go back to your SIM Manager, tap on the newly created eSIM profile, and find the toggle for Data Roaming. Turn it to the active position. You should see the network signal bars appear at the top of your screen within a few seconds. If you find yourself in a dead zone or the connection seems slow, a quick guide to travel eSIM installation can help you double-check your Access Point Name (APN) settings, ensuring your Android is fully optimized for the local network.
Comparing QR Code Scans vs App Based Activations
Choosing between a QR code and an app based activation often comes down to personal preference and how much you enjoy having extra software on your device. While both methods securely deliver your digital profile to the embedded chip, they offer different user experiences. The QR code is the universal industry standard, providing a hardware level interaction that works directly through your phone settings. App based activations, on the other hand, focus on a branded, guided journey that often handles the heavy lifting for you.
The Universal Simplicity of the QR Code Scan
Scanning a QR code is the most direct way to initiate an eSIM installation because it utilizes the native “Add Cellular Plan” features built into iOS and Android. When you receive a QR code via email, your phone camera acts as the bridge, capturing the activation string and triggering the download immediately. It feels remarkably efficient because you don’t need to create an account or log into a third-party platform just to get your data flowing.
This method is perfect for travelers who want to avoid digital clutter. If you are setting up dual SIM for travel, using a QR code keeps your device’s memory free from extra apps you might only use once. It is a lean, mean way to connect. The process is standardized across almost all carriers, meaning once you know how to scan a code on your iPhone or Samsung, you can do it for any eSIM provider in the world without learning a new interface.
The Guided Logic of App Based Activation
App based activation is designed for users who prefer a “concierge” style experience. Instead of navigating through your phone’s deep settings menus, you simply download the provider’s app, purchase a plan, and tap a button that says “Install eSIM.” The app then communicates with your operating system to place the profile exactly where it needs to go. This often removes the need for a second screen to display a QR code, which is a huge win if you are trying to set up your plan while sitting on a bus or train.
Beyond just the installation, these apps usually provide a dashboard where you can track your data usage in real time. They often send notifications when you have 10% of your data left, allowing you to top up with a few taps. While it requires an extra download, the convenience of one-tap installation and management makes it a favorite for those who find the manual settings menus a bit intimidating.
Efficiency and Performance Comparison
When we look at the actual performance of the connection, there is no difference between a plan activated via QR code and one done through an app. Both methods result in the same digital credentials being stored on your EID. The choice is purely about the “onboarding” flow. Currently, about 25% to 30% of smartphone users have adopted eSIM technology, and most of these installations still rely on the QR code method due to its platform-agnostic nature.
| Feature | QR Code Activation | App Based Activation |
|---|---|---|
| Setup Speed | Very Fast (under 1 minute) | Fast (includes app download) |
| Second Device Needed | Yes (to display the code) | No (done entirely on one device) |
| Data Tracking | Via phone settings only | Real-time in-app dashboard |
| Ease of Use | Standardized/Manual | Automated/Guided |
| Digital Footprint | Zero extra apps | Requires app installation |
Which Activation Path Should You Choose
If you are a seasoned traveler who knows exactly where the “SIM Manager” is in your settings, the QR code is the way to go. It’s snappy, professional, and doesn’t require you to manage another login. Most people find that using dual SIM with eSIM and physical SIM is easiest when they keep their setup as clean as possible.
However, if you are new to the world of digital SIM cards or if you are on the move without access to a laptop or tablet to display a code, the app based path is a lifesaver. It eliminates the “two-device” requirement and provides a safety net of customer support and troubleshooting directly within the app. Ultimately, both paths lead to the same destination: instant, reliable data that lets you skip the roaming fees and stay connected wherever your journey takes you.
Troubleshooting Common QR Code eSIM Setup Issues
So, you have your beautiful, scannable QR code, you are ready to get online, and then nothing happens. Or worse, you get an error message that sounds like something from a sci-fi movie, such as “PDP authentication failure.” Don’t let it stress you out; those hiccups are incredibly common, and usually, they are not a sign that your phone or your new plan is broken. Think of the QR code scan as a high-tech handshake between your phone and the cell tower; if one of the participants misses a beat, the connection doesn’t happen. We are going to go through the common speed bumps experienced with QR code eSIM setup so you can quickly diagnose the issue and move on with your trip.
Addressing the Code No Longer Valid Error Immediately
That little banner reading eSIM Cannot Be Added; This code is no longer valid is one of the most irritating pop-ups a traveler can see. In my book, this error signals a single, overriding problem: re-use. Most QR codes for travel eSIMs are strictly single-use digital keys. If you scanned it once, even if you deleted the profile a moment later, the system marks that key as used up.
We see three main scenarios leading to this:
- The Ghost Install: The phone paused mid-setup, but the profile actually installed in the background without a confirmation message. You must check your Cellular or Mobile Data settings list to see if the new line already exists. If it does, you just need to enable it, not re-scan the code.
- The Expired Voucher: Some providers set an expiration date on the code itself, sometimes six months out from issue. If your code sat in an email in your inbox for too long, it simply expires.
- Poor Scan Quality: If the original image of the QR code was blurry, pixelated, or damaged (perhaps you took a photo of a photo), your phone’s camera cannot read the underlying data string correctly. This results in an “invalid” message because the data it did read was corrupt.
If you confirm the code was definitely only used once and it is still active, your next move is calling the provider for a fresh QR code, plain and simple. For related fixes on this common snag, check out this guide on iPhone eSIM activation error fixes.
Resolving Network Lock Status on Your Device
This is the silent killer of eSIM activations, and it catches far too many people by surprise. If your phone is carrier locked, it doesn’t matter how perfect your QR code is; the phone refuses to even attempt to download a profile from a network that isn’t its authorized home system. It is like having a ticket to a private concert, but your ID shows you belong to a rival venue.
You can verify your status with these quick checks:
- For iPhone Users: Navigate to Settings > General > About. Look for the “Carrier Lock” field. If it clearly says No SIM restrictions, you are good to go. If it shows a carrier name there, it is locked.
- For Android Users: Menu navigation varies, but look under your SIM management settings. If options related to manually selecting a network provider are grayed out or missing, your device is likely locked by the original seller.
The solution here isn’t in the eSIM settings; it is a separate conversation you need to have with your original carrier. They hold the digital key to unlock your phone’s hardware, a process that can sometimes take a full business day to process, so don’t wait until the last minute before your flight to sort this out.
Handling Connectivity Failures During Profile Download
When you scan that QR code, the phone is retrieving a large data package over the internet. This is why a solid internet connection is non-negotiable for setup. If you are relying on sketchy public Wi-Fi in a coffee shop or an unstable airport connection, you are setting yourself up for failure. Many providers give you an error such as PDP authentication failure when this download stalls or fails its security check.
Here is the performance breakdown for connection types:
- Best Performance: A private, secure home Wi-Fi network provides the most stable environment to complete the data download without interruption.
- Acceptable Compromise: Using the existing cellular data from your home plan if you are installing an eSIM for a different carrier. However, be cautious of potential roaming charges from your primary provider.
- Worst Performance: Spotty public Wi-Fi or cellular hotspots. These networks often use firewalls that actively block the type of secure communication required for an eSIM provisioning attempt.
My top recommendation in this situation is to temporarily abandon the public network. If you can tether to a friend’s phone hotspot or find a more reliable connection, retry the scan immediately. A partial installation can sometimes render the original QR code useless. For deeper insight into what happens when the connection fails, look into how to fix PDP authentication failure errors.
When the Error Points to Phone Capacity
It is a lesser-known limitation, but your phone (whether it’s an iPhone or an Android flagship) can only hold a finite number of eSIM profiles at any given time. This isn’t about how many you can use simultaneously, which is usually just two, but how many profiles the internal chip can store for future use. Typically, this limit ranges between five and ten profiles, depending on the device model.
If you are a frequent international traveler, you might have built up a digital backlog of plans from previous trips sitting there dormant. When you scan a new QR code and receive an error suggesting a capacity issue or simply stating the phone won’t save it, it’s time for digital decluttering.
You need to go into your device’s SIM management settings and delete the oldest or expired eSIMs. Deleting a profile frees up a storage slot on the chip, allowing the new activation data to be written. Remember, deleting the profile doesn’t undo your past usage; it just clears the storage space for the new service. This is a quick win that often resolves seemingly mysterious installation blocks.
Checking for Hidden Configuration Conflicts
Sometimes, the setup seems perfect: the phone is unlocked, the connection is strong, and the code scans, but you still don’t get service. When this happens, the problem usually shifts from the installation phase to the configuration phase. Two main culprits routinely cause this disconnect: Data Roaming settings and APN settings.
If you are abroad, you must permit your phone to roam onto the local partner network. This setting is often turned off by default for security. For the eSIM to function while traveling, you need to explicitly go into that specific eSIM’s settings, not your main line, and turn Data Roaming ON.
The other, more complex conflict involves the APN (Access Point Name). This is the configuration address your phone uses to access the destination carrier’s internet gateway. While most modern eSIM providers now configure this automatically, if you are using a niche service or if your device has a software hiccup, the APN might be wrong. If toggling Data Roaming doesn’t work, verify that the APN settings in your carrier’s instructions exactly match what is entered in your phone’s network configuration menu.
 Photo by Jacob
Diagnosing Device Not Supported Errors
When your phone explicitly tells you that the eSIM cannot be added because the device format is wrong, you have hit a hardware wall. This error does not come from the QR code itself; it comes from the fact that your handset lacks the secure element chip required to store the digital profile. While nearly all flagship phones made after 2019 support eSIM, budget models sold in certain regions might not have it.
- Hardware Replacement: There is no software update or setting adjustment that can install an eSIM chip into a phone that was not manufactured with one inside.
- Verification Check: If you are unsure about your older device, look for the EID (Embedded Identity Document) number by dialing *#06#. If an EID number appears alongside your IMEI, you have the necessary hardware. If it is missing, you are limited to physical SIM cards.
Understanding Why a Code Might Need Manual Entry
While scanning the QR code is the primary and easiest activation route, manual entry is the necessary fallback when the camera system struggles. You should only resort to this if the camera refuses to read the code clearly due to reflections, low light, or small screens. Manual entry bypasses the image recognition software entirely and plugs the activation data directly into the installation request.
There are two key pieces of information required for this backup plan:
- The SM-DP+ Address: This is the server address the phone needs to connect to for the download. It looks like a web address, often beginning with a secure protocol indicator.
- The Activation Code: This is a unique, often long, alphanumeric string that authenticates your specific purchase session with the carrier’s server.
Be extremely careful when typing these details. Typos in either field result in failure, often requiring you to request a completely new QR code because the system flags repeated failed attempts as suspicious. Always ensure you are copying the address exactly as provided, avoiding extra spaces before or after the text.
What To Do If Your eSIM Works But Data Usage Is Zero
You scanned the code, the profile installed, your phone shows the new carrier name, but absolutely nothing loads. This scenario almost universally points back to the roaming authorization step. If you use a travel eSIM, it is designed to connect to a local foreign network, which your phone initially sees as roaming.
For the internet connection to flow, you must activate the Data Roaming toggle specifically for that new eSIM line. On iOS, this is in Settings > Cellular > [Your New eSIM Label] > Data Roaming. On Android, you find it in the SIM Manager under that specific profile’s settings. Crucially, only enable Data Roaming for the travel eSIM; keep it deactivated on your primary home SIM to avoid massive charges. If you are still stuck after confirming data roaming is on, it might be a subtle APN issue, which is why cross-checking your settings is the final logical step.
Best Practices For Using eSIM While Traveling Internationally
Adopting a travel eSIM is the smartest move any globetrotter can make today; it completely changes the communication game when you are overseas. To maximize this technology, you cannot just trust the initial scan; you have to manage settings carefully to avoid surprise charges and connection drops.
Maintaining a reliable connection means mastering the subtle interplay between your primary line and your travel line. Following a few simple rules ensures your connection remains crisp, affordable, and reliable, whether you are checking in from a remote beach or navigating a busy city center.
Ensuring Your Phone Is Ready: The Unlocked Check
The absolute first thing you must confirm, before even purchasing a QR code, is the carrier lock status of your device. If your iPhone or Android is locked to your home network because you purchased it on a contract, the eSIM QR code is functionally useless. A locked phone will not communicate with any other network provider, which defeats the purpose of getting global data.
To check this prerequisite, look inside your device settings. On most modern smartphones, you navigate to the About or General section and search for the Carrier Lock status. If that field displays No SIM restrictions, you are clear to proceed with installing any travel eSIM. If it lists a specific carrier name, contact your original provider to request an unlock before you depart.
Mastering Dual SIM Management After Installation
Once you scan the code and the profile downloads onto your phone chip, you must manage the two lines. Modern smartphones support dual SIM functionality, allowing you to keep your physical home SIM active alongside the new digital travel eSIM. This setup lets you receive bank codes and family texts on your home number while using the eSIM for local data.
To avoid roaming fees from your home plan, you must designate the Cellular Data source to be your travel eSIM. Inside your cellular settings, set the travel line as the primary data path. Crucially, you must also disable Data Roaming on your Home SIM. Keeping roaming off for your primary line stops your phone from using expensive home plan data while you are abroad.
The Critical Need For Data Roaming On The eSIM
A common mistake for travelers is leaving data roaming off for the travel eSIM itself. While roaming is usually associated with high costs, travel eSIMs actually require the roaming toggle to be ON to function. These digital plans work by partnering with local carriers in your destination, which the phone views as a roaming connection.
If Data Roaming stays off on the travel line, your phone will not connect to the local partner network. Use this simple configuration upon landing:
- Home SIM: Keep ON, Data Roaming = OFF.
- Travel eSIM: Keep ON, Data Roaming = ON.
This configuration is the gatekeeper to your international data. Managing your data correctly is vital, and you can find more help in this guide to tracking and topping up eSIM data to stay on top of your usage.
Optimizing Data Usage and Preventing Drain
Even with a dedicated plan, you should prevent background apps from eating through your allowance. Data usage varies significantly by activity:
- Text-based emails: Very minimal usage.
- Google Maps: Approximately 5 to 10MB per day.
- Social Media (Reels/TikTok): 300MB to 1GB per hour.
- HD Video Streaming: Up to 3GB per hour.
To save data, restrict background refresh in your settings and turn off auto-updates for your apps. If you are unsure about your requirements, a guide on how much data I need for international travel can help you choose the right package.
Using VoIP Calls Over Data Settings
Because your data connection is active, you can use Voice over IP (VoIP) calling to stay in touch. Apps like WhatsApp, FaceTime, and Skype use your eSIM data to transmit voice and video, which is much cheaper than traditional international calls.
Treat these apps as your primary communication tools. As long as you have a stable data signal, you can reach anyone in the world. If you need a more traditional setup, you can learn about making calls with a data eSIM to bridge the gap between digital and cellular calling. Always test these apps on Wi-Fi before you leave to ensure your contacts are synced and ready.
Conclusion
Setting up your connection via a QR code is a total game-changer for staying online without the headache of physical SIM cards or expensive roaming fees. Preparation is everything when it comes to a smooth install; taking thirty seconds to verify your phone is unlocked and having a solid Wi-Fi connection makes the difference between instant data and a frustrating error message.
Keep your QR code email safe so you can reference the manual backup details if your camera ever struggles with the scan. As the industry moves toward a digital-only future by 2026, mastering these quick steps ensures you stay ahead of the curve and connected wherever you land. If you’re ready to skip the airport kiosks and start browsing the moment you touch down, check out our latest travel data plans to find the perfect fit for your next adventure.