
eSIM vs Physical SIM: What’s Better for International Travel in 2026
You land after a long flight, switch off airplane mode, and your phone just sits there. No maps loading, no rideshare, no campground check-in message, no park permit QR code. In that moment, getting data fast matters more than any travel hack.
This guide compares eSIM vs physical SIM for international travel in 2026 with simple pros and cons, real-world pricing ranges, and clear picks for different travel styles (including road trips, camping, families, and multi-country routes). The big shift in 2026 is that most newer phones support eSIM, and a lot of travelers now run dual SIM (keeping their home line active, while using a travel eSIM for data).
eSIM vs physical SIM in plain English: what changes for travelers
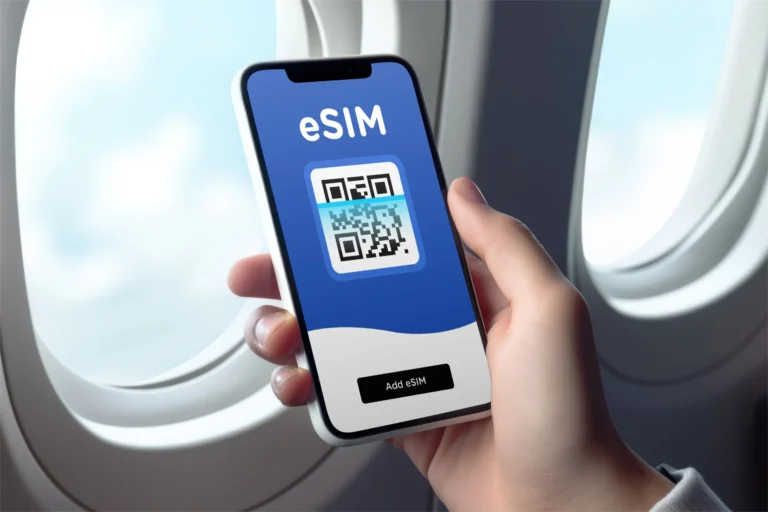
A physical SIM is the small plastic chip you insert into your phone. An eSIM is a digital SIM profile you download to your phone, usually by scanning a QR code or using an app.
For travel, the tech details don’t matter as much as the practical stuff:
- Buying: eSIM plans are usually bought online in minutes. Physical SIMs often mean finding a shop, a kiosk, or ordering one in advance.
- Activating: eSIM activation can happen before you leave home (install now, turn on later). Physical SIM activation happens after you insert it, and sometimes after identity checks.
- Switching countries: eSIM makes it easier to switch plans without opening your SIM tray. Physical SIM means swapping cards each time.
- Keeping your home number: with dual SIM, you can keep your home SIM active for calls and texts, and use the travel plan for data.
Why eSIM feels easier when you land in a new country
An eSIM is like having a spare key in your pocket. You can set it up before you travel, then “turn it on” when you arrive. Many travelers buy a plan the day before a flight, install it at home Wi-Fi, and land with data ready.
That helps with the stuff that tends to break first when you’re tired and jet-lagged:
- Maps and offline backups that need a quick refresh
- Translation apps that work better with live data
- Park reservation portals and timed-entry systems
- Messaging a host, a campsite, or a rental car pickup
Border crossings are where eSIM shines. If your itinerary bounces through multiple countries, you can keep more than one eSIM profile stored and switch in your phone settings. No tiny SIM tray tool, no balancing a paperclip on your knee, no “where did I put my home SIM?” panic.
Dual SIM is the quiet hero here. Many travelers keep their home SIM on for 2FA codes and important calls, while forcing all mobile data through the travel eSIM. That one setting can prevent expensive roaming surprises.
When a physical SIM is still the smart move
Physical SIMs are not obsolete. They’re still the right choice in a few common travel situations.
A physical SIM is often the smart move if:
- Your phone doesn’t support eSIM, which is still common on older and budget models.
- You’re staying in one country for a long time, and local prepaid deals are cheaper if you buy them in town (not at the airport).
- Your destination has limited eSIM options, or the available eSIM plans are expensive.
- You swap phones often, or you want to move your plan between devices quickly.
The friction is real, though. Physical SIM travel can mean hunting for a store, dealing with language barriers, and getting hit with airport kiosk markups. You also have to store your home SIM safely. Losing it is annoying, and it can mess up logins and texts when you get back.
In 2026, physical SIM is still the compatibility king. If you need the option that “just works” across almost any phone, plastic still wins.
The 2026 travel test: cost, coverage, speed, and stress
Most travelers don’t care about SIM types. They care about four things: price, signal, speed, and hassle.
In 2026, typical travel eSIM pricing often falls into these patterns (exact prices change by country and provider, so treat these as ranges you’ll see often):
- Many travel eSIM plans sit around $10 to $50 depending on data size and region.
- Europe 10GB for 30 days commonly lands around $15 to $25.
- “Unlimited” eSIM plans often price as a premium, and may slow down after heavy use.
- Global bundles for mid-range data often land around $50 per month.
Home-carrier roaming is still where people get burned. Daily passes can look simple, but the bill adds up fast on a two-week trip.
Here’s a quick, traveler-focused snapshot:
OptionWhat you’re buyingTypical 2026 cost patternBest forMain downsideTravel eSIMData plan (country, regional, or global)Often $10 to $50Convenience, multi-country tripsNeeds eSIM-compatible, unlocked phoneLocal physical SIMLocal prepaid planCan be very cheap if bought in townLong stays, local pricingStore visits, ID checks, swapping cardsHome roaming (daily pass)Use your home plan abroadOften $5 to $15 per dayShort trips, zero setupExpensive over time, easy to forget
Price reality check: eSIM plans vs local SIM deals vs roaming
What you actually pay for depends on four knobs:
Data size: 1GB for light use, 10GB for normal travel, 20GB+ if you stream, work, or hotspot.
Days: 7-day, 15-day, and 30-day plans change the value a lot.
Coverage: single-country plans are usually cheaper than regional or global.
Top-ups: some plans are easy to refill, others push you to buy a new plan.
In the current travel market, providers like Airalo, Saily, Ubigi, Nomad, and Holafly commonly show Europe 10GB pricing around the mid-teens to mid-20s for 30 days, while unlimited-style plans tend to cost more and can slow down after a fair-use threshold.
Local physical SIMs can still win on raw price, especially if you walk into a carrier store away from airports. If you’re staying three or four weeks, that savings can be real. The trade is time and effort.
Roaming is usually the most expensive option. Even if you use a daily pass like Verizon’s TravelPass (often priced per day), a two-week trip can cost more than many travel eSIM plans. Roaming also has a sneaky failure mode: you forget it’s on, then your phone updates photos in the background.
Coverage and reliability: what matters when you are off the beaten path
For camping and road trips, coverage is less about eSIM vs physical SIM and more about which local networks you end up on.
Both eSIMs and local SIMs use local carrier towers. If the tower doesn’t exist where you’re camping, neither SIM type can fix it. What you can control is your odds:
- Some travel eSIMs partner with one carrier in a country, others can roam across more than one.
- A plan that can connect to multiple partner networks can help when you drive from a city to rural areas.
- “Global” plans can be convenient, but you should still check whether they use a strong network in your exact region.
If your trip includes national parks, mountain roads, or coastal stretches with spotty service, do two quick checks before you buy: look at the provider’s network notes (if listed), and search recent traveler reviews for the specific area. “Works in 200+ countries” doesn’t tell you how it performs at a trailhead.
Pick the right option for your trip style (quick recommendations)
The best SIM choice is the one that matches your trip, your phone, and your tolerance for setup.
Here’s a simple way to decide:
If you’re on a single-country city trip, choose an eSIM plan for that country. It’s fast, predictable, and you can set it up before takeoff. If you’re staying longer than a month, compare it to a local physical SIM from a non-airport shop.
If you’re doing a multi-country itinerary, an eSIM is usually the easiest path. You can use a regional plan (for example, Europe-wide coverage) or store a few country plans and switch when you cross borders.
If you’re doing a remote camping road trip, pick the option that gives you the best carrier coverage for the route. That might be a travel eSIM that uses a strong local partner, or a local physical SIM from a carrier known for rural coverage. If you can, treat connectivity as a safety item, like a headlamp: bring a backup plan.
If you’re traveling as a family with multiple devices, decide whether you want one hotspot phone or separate plans. One hotspot is cheaper, but it puts battery life and signal luck on one person’s shoulders.
If you travel for work and must keep your number, dual SIM is the default best setup when your phone supports it. Keep your home SIM active for calls, texts, and two-factor logins, and route data through the travel eSIM.
Best choice for multi-country trips in 2026
For multi-country travel, eSIM usually wins because it’s built for switching. You can keep several eSIM profiles stored and swap in seconds. That beats buying a new plastic SIM in every country, especially if you arrive on a Sunday or late at night.
Regional plans can also cut down the mental load. Instead of thinking, “Do I need a new SIM for the next stop?” you keep one plan running through multiple borders.
One practical tip: install your eSIM before your trip, and activate it before you cross your first border (or while you still have solid Wi-Fi). The only thing worse than no data is being stuck trying to activate a plan when you can’t load the activation screen.
Best choice for families and groups traveling together
Families tend to break connectivity into two camps: shared data or independent data.
If one person hotspots for everyone, check three things before you commit:
- Hotspot support: some eSIM plans allow it, some don’t.
- “Unlimited” rules: unlimited plans can slow down after heavy use, which hits hardest when kids stream or update apps.
- Battery reality: hotspot mode can drain a phone fast, especially in low-signal areas.
If each traveler gets their own eSIM, you pay more, but you gain redundancy. Two phones with working data can save a day when you’re split up at a museum, a trail junction, or a busy transit station. For groups that travel by car, it also helps when the lead car loses signal and the second car still has it.
How to set it up safely before you fly (and avoid common mistakes)
A travel SIM is simple until it isn’t. The best way to avoid stress is a short pre-flight routine. Think of it like checking your stove before leaving home.
Start with these basics for both eSIM and physical SIM:
- Confirm your phone is unlocked (carrier-locked phones are a common failure point).
- Confirm compatibility (not every phone supports eSIM).
- Save key details offline, including plan info and support links.
- Turn off data roaming on your home line if you want to avoid accidental roaming charges.
- Test something small before you leave, like loading a map or sending a message.
Security matters too. An eSIM can’t be physically stolen out of your SIM tray, but your phone can still be stolen. Use a screen lock, protect your email account, and lock down your main carrier login. Physical SIMs can be lost, swapped, or damaged, so treat them like a small passport page, not like a scrap of plastic.
eSIM setup checklist for 2026 phones
- Check for eSIM support in your phone settings (look for “Add eSIM” or “Add cellular plan”).
- Confirm your phone is unlocked. If it isn’t, fix that before you travel.
- Buy a plan from a reputable provider and pick the right region and days.
- Install via QR code or the provider app while on stable Wi-Fi.
- Label the line something obvious like “Travel Data.”
- Set your travel eSIM as the default for cellular data.
- Keep your home SIM active for calls and texts if you need 2FA.
- Turn off data roaming on the home line to prevent surprise charges.
- If you use it, enable Wi-Fi calling for your home line before you leave.
- Test: open maps, send a message, and confirm which line is using data.
One simple habit helps a lot: keep a copy of your QR code or activation details available offline (for example, saved in secure storage). If you need to reinstall, you won’t want to hunt through email while your data is down.
Physical SIM setup checklist (so you do not misplace your home SIM)
- Pack a SIM tool (or a small paperclip) in a wallet pocket or toiletry kit.
- Before swapping, power off your phone and work somewhere clean and well-lit.
- Store your home SIM in a labeled case. A small zip bag works in a pinch.
- If your new SIM doesn’t connect, ask the shop for APN settings help.
- Avoid airport kiosks if you care about price. Buy in-town when you can.
- Plan extra time in countries that require passport registration for prepaid SIMs.
The biggest physical SIM mistake is losing the home SIM. The second biggest is tossing the packaging and forgetting the plan details, then being stuck when you need support.
Conclusion
For most international travel in 2026, eSIM is the better choice because it’s quick to activate, easy to switch between countries, and helps you avoid roaming bill shock, especially when you use dual SIM. Choose a physical SIM if your phone isn’t eSIM-ready, you’ll stay long-term in one country and want the cheapest local rate, or you want a simple backup card in your bag. Before you book campsites, park permits, or rail passes, check your phone’s compatibility and decide how you’ll get data on day one.