
Using eSIM on iPad: Your Best Travel Hotspot and Backup Plan Guide (2026)
It is a common traveler headache: landing in a new country and realizing your phone has service but your iPad doesn’t, or worse, relying on a clunky, battery-draining mobile hotspot from your phone. You are losing time and probably paying way too much for spotty international roaming. That era is thankfully over because the eSIM on iPad is the superior solution for getting connected on your tablet while abroad.
This technology turns your cellular-enabled iPad into its own independent, high-performance communication hub. We are talking about instant connectivity without ever hunting for a SIM card shop or worrying about finding reliable Wi-Fi. It’s really about efficiency, slashing those expected data costs, and building a dependable backup connection into your primary work and entertainment machine.
The main focus here is how the iPad’s built-in eSIM capability handles two key travel needs: serving as a persistent, powerful hotspot for your other gadgets, and acting as your fail-safe data line if your primary phone plan acts up. This setup provides a representative answer to the connectivity struggle by ensuring you have a dedicated data pipeline that doesn’t rely on your phone’s battery. We’ll look at exactly how this works with modern cellular iPads and why grabbing a travel plan ahead of time is a total no-brainer for anyone serious about keeping their travel flow intact.
Why Travelers Use eSIM on iPad in the First Place
Travelers prioritize the iPad as a primary connection point because it bridges the gap between the portability of a smartphone and the heavy-duty utility of a laptop. Using an eSIM transforms the tablet from a simple consumption device into a high-performance connectivity hub that manages your entire digital life on the road. It offers a level of operational independence that prevents you from draining your phone’s battery while trying to finish work or navigate a new city.
When an iPad Makes Sense as a Travel Connectivity Hub
An iPad functions perfectly as a central node for your other tech because it handles the heavy lifting of data management without the bulk of a computer. When you are on a long train ride or sitting in a cafe with no Wi-Fi, your iPad becomes the primary gatekeeper for the internet. It can power a laptop for heavy typing, keep a camera connected for instant photo backups, and provide a steady signal for a secondary phone; all while maintaining its own tasks.
The battery efficiency of the iPad is a major factor here. Most iPads have significantly larger batteries than smartphones, meaning you can run a hotspot for hours without the device dying before lunch. In 2026, the absence of physical SIM trays has allowed for even larger internal batteries, extending your uptime even further. When you use your iPad as the hub, your phone remains free for photography, calls, and quick navigation, ensuring that no single device is overwhelmed.
Choosing to locate eSIM ICCID on iPad before you leave ensures you can manage these connections the moment you land. This setup creates a resilient network that is easier to manage from one large screen rather than juggling multiple small devices and local SIM cards.
eSIM vs Wi-Fi Only iPads for Trips
Choosing a cellular-enabled iPad over a Wi-Fi only model is a total game-changer for anyone who moves frequently between cities or countries. The Wi-Fi only model tethers you to stable environments; you are constantly hunting for cafe passwords, dealing with the security risks of public networks, or begging for a hotspot from a friend. This “Wi-Fi hunting” wastes precious travel hours and often leaves you stranded when you need a map or a ride-share app the most.
The eSIM model provides a level of autonomy that traditional tablets simply lack. It offers instant “Travel Mode” capabilities where the device identifies local networks immediately upon arrival. You don’t have to worry about the iPad eSIM device limitations typically found when trying to share one plan across multiple hardware units because the iPad serves as its own independent source.
While a Wi-Fi only iPad is cheaper upfront, the hidden costs of international roaming on your phone or the price of dedicated portable hotspots quickly bridge that gap. With an eSIM, you get:
- Continuous GPS: Unlike Wi-Fi models, cellular iPads have a dedicated GPS chip for precise navigation.
- Security: You avoid the dangers of “man-in-the-middle” attacks prevalent on unencrypted public Wi-Fi.
- Reliability: The dual-network stability in 2026 models allows the iPad to blend signals from two carriers for a lag-free experience.
Having a dedicated data line on your tablet means you are never disconnected, making the eSIM model the only logical choice for a professional or enthusiast traveler.
Which iPad Models Support eSIM
Knowing which hardware works with digital SIM technology is the first step toward a more flexible travel setup. Not every iPad released in the last few years has the guts to support an eSIM, so you have to be specific about the generation and the cellular capability. If you have “Wi-Fi Only” written on your box, you are out of luck; you specifically need a “Wi-Fi + Cellular” model to access these features.
Cellular iPad Models That Include eSIM
Apple has been steadily integrating this tech since 2018, but the landscape shifted dramatically with recent releases. To find a compatible device, you are generally looking at any Pro model from 2018 onwards, as well as modern Air and Mini versions. In fact, if you are looking at the latest hardware, the 2026 shift toward eSIM-only designs means the physical SIM tray is officially a relic of the past for premium tablets.
Here is a quick breakdown of the specific families that support digital SIMs:
- iPad Pro: The 11-inch (1st gen or later) and the 12.9-inch (3rd gen or later) are fully equipped. The newest M-series Pro models are the gold standard for this, often allowing for multi-eSIM support for iPad devices where you can store multiple profiles at once.
- iPad Air: You need the 3rd generation or anything newer to get in on the action. The Air has become a powerhouse for travelers who want Pro-level connectivity without the Pro-level price tag.
- iPad Mini: Start with the 5th generation or the more recent 6th and 7th gen models. These are my personal favorites for light travel because they fit in a jacket pocket while keeping you online.
- Standard iPad: Even the entry-level iPad (7th gen through the current 10th gen and beyond) includes eSIM support in its cellular configurations.
By 2026, the industry has reached a point where nearly 95% of high-end tablets sold in major markets have ditched the plastic card for an embedded chip. This move allows for slightly larger batteries and better water resistance, which is a win for anyone who uses their tablet in unpredictable environments.
How to Check Your Exact iPad Model
If you inherited your iPad or simply forgot which version you bought three years ago, don’t sweat it. Checking for compatibility takes less than a minute and saves you from buying a data plan that won’t work. The most reliable way to verify is directly through your tablet software rather than trying to guess based on the color or screen size.
Follow these simple steps to find your answer:
- Check Settings: Open the Settings app and tap on General, then select About.
- Find the Model: Look for the Model Name (like iPad Air 5th Gen) and the Model Number. If you tap the model number, it will toggle to a shorter code starting with the letter “A” followed by four digits.
- Confirm Cellular Status: Look back at the main Settings list. If you see a menu item labeled Cellular Data or Mobile Data, your iPad has the necessary hardware. If that menu is missing, your device is Wi-Fi only.
- Verify eSIM Menu: Tap on Cellular Data. If you see an option that says Set Up Cellular Data or Add eSIM, you are officially ready to go.
If you find that your device is compatible, you can move directly to a step-by-step iPad eSIM installation guide to get your travel data running. It’s always better to confirm this while you have a stable home connection before you are standing in a busy airport trying to figure it out.
How eSIM Works on iPad Step by Step
Getting your iPad connected to a cellular network is much faster than it used to be. You no longer have to track down a retail store or wait for a piece of plastic to arrive in the mail. Instead, you can download a digital profile that tells your tablet exactly how to talk to local towers. This process is remarkably straightforward, but it does require a bit of preparation to ensure everything goes smoothly the moment you land in a new destination.
Installing an eSIM Profile on iPad
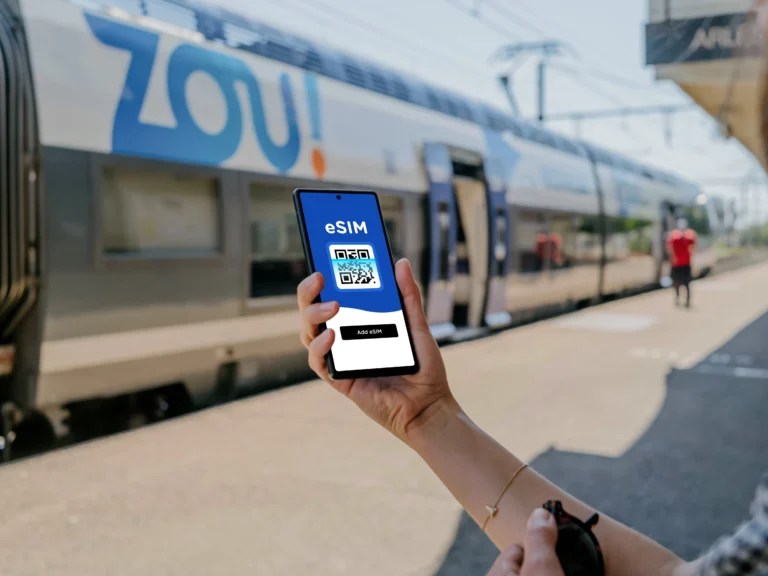
Installing your travel data plan is basically a digital handshake between your iPad and the carrier. To initiate this, you generally have two paths: scanning a QR code or entering the details manually. Most providers will email you a QR code immediately after purchase. To set it up, go to your Settings, tap on Cellular Data, and select Add eSIM. From there, just point your iPad camera at the code. If your email is on the iPad itself, you can often save the QR code to your photos and import it directly into the setup window.
A stable Wi-Fi connection is the most critical part of this entire process. I cannot stress this enough; if your Wi-Fi drops while the iPad is trying to register the new profile with the global network, the installation might hang or fail. Do this at your hotel or at home before you head to the airport. If the QR code doesn’t work for some reason, don’t panic. You can choose the Enter Details Manually option and copy-paste the SM-DP+ Address and Activation Code provided by your vendor.
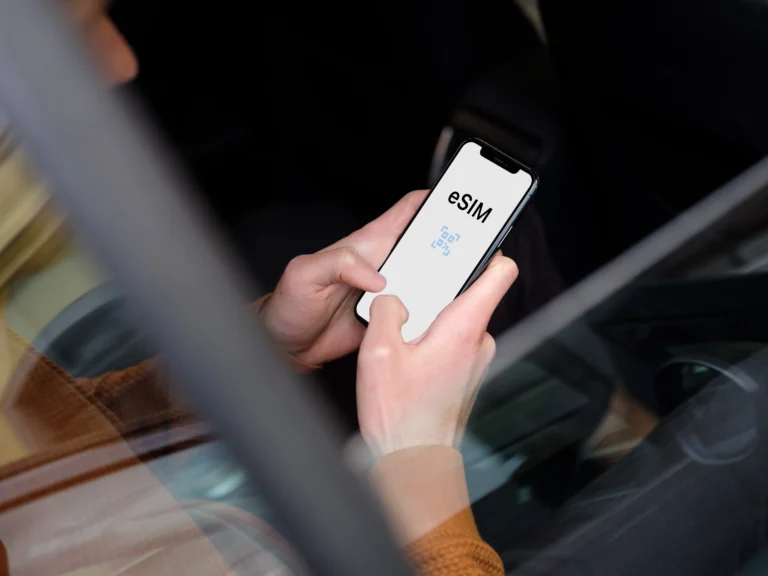
By 2026, many premium providers have moved toward push activation. This means you might not even need a code; you simply open the carrier app and tap a button to “push” the plan into your iPad settings. Regardless of the method, once the profile is downloaded, your iPad will take a minute or two to find the signal. You should see bars appearing in the top corner, signaling that you are officially online and ready to browse.
Managing Cellular Settings While Traveling
Once the eSIM is installed, you need to tell your iPad how to use it without accidentally racking up bills on your home plan. The most important toggle you will ever find is Data Roaming. For your travel eSIM line to work, you must turn on Data Roaming specifically for that profile. This allows the digital SIM to jump onto local partner networks in the country you are visiting. Without this turned on, you might see “No Service” even if your plan is active and valid.
If you are using an iPad that supports a physical SIM and an eSIM simultaneously, you have to be careful with your primary line. To avoid unexpected charges from your home carrier, go into the Cellular Data settings and ensure that the “Cellular Data” selection is pointed specifically at your new travel eSIM. You can actually turn off your primary line entirely in the settings menu if you want to be 100% safe. This prevents your home carrier from charging you a daily “international pass” fee just because your tablet checked for a software update or downloaded a stray email.
Keep an eye on the Status section under your cellular plan. This area shows you exactly how much data you have used. Many travelers forget that iPads are data-hungry machines compared to phones. They often download high-resolution photos or run background updates that can chew through a 10GB plan in no time. I recommend turning on Low Data Mode for your travel line; this pauses those non-essential background tasks and helps your travel budget last for the duration of your trip. Just follow a solid step-by-step iPad eSIM installation guide to make sure these toggles are set correctly before you start exploring.
Using iPad eSIM as a Hotspot for Other Devices
Using your iPad as a mobile router is one of the smartest moves you can make while traveling. Since the iPad has a much larger battery than your phone, it acts as a more stable anchor for all your other gear. You can keep your phone free for quick photos or calls while your iPad does the Heavy lifting of providing internet to your laptop or camera. It creates a dedicated “travel network” that follows you from the airport to the hotel without the need for clunky external hardware.
Sharing Data With Phones Cameras and Laptops
When you use your iPad as the primary link, you are essentially creating a personal bubble of high speed data. This workflow is perfect for the person who needs to stay productive on a laptop or upload high resolution images from a digital camera. Instead of hunting for expensive hotel Wi-Fi that barely works, you simply toggle the Personal Hotspot on your iPad. Your other devices see it just like a regular Wi-Fi network, and because it is powered by an eSIM, the connection is encrypted and much safer than anything you would find in a public cafe.
Modern iPads are quite clever at managing these multiple connections. You tracks your usage across all connected pieces of hardware right in the settings menu, which helps you stay within your data limits. If you are a digital nomad, this setup is a total lifesaver. You can participate in a video call on your laptop while your iPad continues to sync your emails in the background. Digital cameras with Wi-Fi capabilities can also tether to the iPad to back up photos to the cloud in real time; ensuring your memories are safe even if you lose your SD card.
To maximize this setup, you should follow a few simple steps:
- Change the Network Name: Give your iPad hotspot a unique name so you can find it quickly in a crowded area.
- Set a Strong Password: Avoid using “12345678” because you are essentially paying for the data others might steal.
- Maximize Compatibility: Enable the “Maximize Compatibility” toggle in your hotspot settings if you are trying to connect older laptops or specialized gear.
Battery Drain and Heat Considerations
While the iPad is a powerhouse, running a hotspot is one of the most demanding tasks you can ask of it. Generating a Wi-Fi signal while simultaneously pulling data from cellular towers creates a fair amount of internal heat. You might notice the back of your iPad getting warm to the touch during long work sessions. This is normal, but you should avoid leaving the tablet in direct sunlight or tucked inside a backpack while the hotspot is active; as this can lead to thermal throttling where the device slows down to cool itself off.
The battery drain is also something you need to watch. Even with the massive batteries found in 2026 models, providing internet to three or four other devices will deplete your charge faster than offline use. By 2026, many tablets use stacked battery cells that handle this stress better than older designs, but you still need a plan. If you are planning an eight hour workday from a beach or a train, bringing a high quality power bank is a non-negotiable.
To keep your device cool and your battery healthy, consider these tips:
- Limit Connected Devices: Every extra phone or laptop connected forces the iPad to work harder and generate more heat.
- Plug into Power: If you are at a desk, keep the iPad plugged in so the battery stays topped off while it works as your router.
- Turn off Background App Refresh: This prevents the iPad from doing its own data-heavy updates while it is busy serving your other devices.
By 2026, the efficiency of AI-managed charging means your tablet handles these high-drain tasks better than ever. Still, treating your iPad with a bit of care regarding heat will ensure it lasts for years of travel adventures.
I have completed the sections on using the iPad as a hotspot and managing battery and heat concerns for your guide.
Building a Reliable Travel Backup Plan With iPad eSIM
The iPad, with its bigger screen and battery, is often the travel workhorse; it handles the documents, the heavy reading, and sometimes even the minor editing tasks we can’t manage on a phone. Relying on your phone for both calls and hotspot tethering is a rookie error, frankly, because it burns through your phone’s battery faster than anything else. When you install a dedicated travel eSIM directly onto a cellular-enabled iPad, you build a powerful, independent safety net into your primary media and productivity device. This means the iPad operates completely autonomously regarding connectivity.
If one carrier fails you, you aren’t just stuck; you have a second line ready to go. This architecture is what separates the seasoned road warrior from the tourist constantly hunting for a charger and a store selling local plastic SIM cards. If you’re planning a long road trip, camping out in a rural spot, or staying in a long-term rental far from the city center, this dual-carrier approach is not optional; it’s how you maintain mission-critical connectivity.
Redundancy for Road Trips Camping and Remote Stays
When you leave consistent urban centers, cellular coverage becomes less of a guarantee and more of a lottery; this is where having two different carriers’ profiles loaded onto your devices really pays off. Think about it: maybe the primary carrier your phone uses has a great 5G connection downtown, but once you hit that remote state park or that tiny European village, their signal drops to zero bars. If your iPad has an eSIM for a second, more geographically broad carrier, you simply switch the active line on the tablet and keep routing your laptop and camera through it without missing a beat.
This setup is incredibly important for travelers who depend on reliable data for navigation or remote client check-ins. We’ve all been there, relying on one provider only to find spots where they just don’t transmit a signal. By 2026, the reality is that different carriers own different cell towers, and having access to both inventories via your phone (one carrier) and your iPad (using a second carrier’s eSIM) provides an immediate, on-device failover system. You aren’t fumbling with apps or swapping physical cards; you just activate the redundancy built into the iPad itself. Travelers should aim to select eSIM providers that focus on broad regional coverage rather than single-country deep saturation for this backup role.
For extreme situations, like setting up camp deep in the backcountry, having this level of redundancy means your ability to manage logistics, check weather updates, or even call for help remains completely intact. Your phone might struggle, but the iPad, acting as the main hub, can pull power from a battery bank while it monitors the secondary network. It’s about signal diversity, turning the landscape itself into your backup plan’s asset pool.
 Photo by Andrea Piacquadio
For example, you might keep your primary phone line solely with a carrier known for strong urban performance, while the iPad’s eSIM is loaded with a plan from a different provider that prioritizes rural coverage across the wider area you plan to explore. This is proactive travel planning in its simplest, most effective form. It means continuous uptime, which is the true luxury for any traveler in this decade. As recent analyses show, tablet connectivity is increasingly becoming the backbone for digital work on the road, making this redundancy a top-shelf necessity.
Choosing An eSIM Plan For iPad Travel
Deciding on the right travel connectivity for your cellular-enabled iPad is the difference between smooth operation and frustrating downtime. You aren’t buying a plan for a small phone screen; you’re provisioning a larger productivity device that can often act as the internet backbone for your whole trip. This requires a different thought process than just grabbing the cheapest national roaming package. When you choose an eSIM profile for your iPad, you essentially install a digital key that unlocks a local network, and that choice dictates your speed, your security, and your wallet’s happiness. By 2026, the trend shows that tablets are moving toward unified data pools, but specific travel plans still offer the best short-term value for global excursions.
Evaluating Data Needs Based On iPad Usage Patterns
Your data consumption profile on an iPad is almost always higher and more varied than on a phone; that’s just fact. A phone mainly handles texting, quick social media scrolling, and messaging. Your iPad, however, handles document uploads, large email attachments, business conferencing software, and potentially downloading your entire vacation photo library to a cloud service while you drive. If you plan to use your iPad as a hotspot for a laptop, you need to account for the laptop’s data hunger as well. That’s a substantial drain you must plan for.
For instance, I generally categorize usage like this when planning:
- Light Use (Emails, Web Browsing, Messaging): Plan for 1 GB per travel day. This is usually a safe floor if you are mostly on Wi-Fi in your hotel.
- Medium Use (Navigation, Streaming Music, Cloud Syncing Maps): Plan for 2 GB to 3 GB per travel day. This covers regular background syncing while you are out and about.
- Heavy Use (Hotspotting a Laptop, Video Conferencing, Large Downloads): You need to budget for 5 GB to 10 GB per day. If you are working remotely, treat your iPad data like your home broadband allowance; you cannot afford to run out mid-day.
Remember, the newest trend shows tablets getting AI data managers that try to optimize usage, but they can’t create data out of thin air. If the plan runs dry, you are disconnected, so always budget closer to the heavy use tier if you rely on the iPad for work. It’s better to have 5 GB left over than to pay exorbitant overage fees or find the connection gone when you need it most.
Comparing Local eSIMs Versus Global Travel Plans
When shopping for connectivity, travelers face two primary paths: the local eSIM and the global travel eSIM. Both have strong arguments, and where you are traveling dictates which one wins. A local eSIM means you purchase a temporary plan directly from a carrier operating inside the country you land in, like buying a local SIM card but digitally. A global travel eSIM, conversely, is purchased from an international provider who has roaming agreements with various local networks.
The choice comes down to convenience versus cost optimization.
Local eSIM Advantages:
- Cost Efficiency: For long stays (more than two weeks) in one country, the local operator often has unlimited or very large data packages that undercut global providers on price.
- Maximum Speed: You are connecting directly to the primary network, often ensuring you get the maximum available local speed tiers.
Global eSIM Advantages:
- Instant Activation: You purchase and install it before leaving home. You land, turn it on, and it just works, often connecting immediately after you exit customs. This is a huge win for the user experience.
- Coverage Redundancy: If one carrier’s coverage is poor in a specific region, your global provider can automatically switch you to a partner carrier’s tower, giving you a built-in fail-safe. This supports the resilience built into your setup.
- Managing Multiple Countries: If your trip involves five different countries in three weeks, a global plan avoids the headache of buying, activating, and deleting five separate local eSIM profiles.
To me, the global plan remains the best choice for short, multi-country trips because the convenience factor outweighs the small price premium. However, if you know you are staying in Thailand for a month to work from a beach hut, scouting a local eSIM provider known for great coverage there makes financial sense. The modern market sees carriers offering Micro-Slices of data too, allowing you to customize these plans for specific activities, a trend that makes for smarter buying decisions.
Setting Up Pre-Paid eSIM Profiles Before Departure
You absolutely must set up your travel eSIM before you step on the plane. This is non-negotiable for achieving a clean startup abroad. Dealing with carrier websites or troubleshooting activation issues while jetlagged at an airport kiosk is a terrible way to start any vacation or business trip. The key is to have the profile loaded and ready to activate upon arrival.
Here is the typical sequence I recommend for preparation:
- Select the Provider: Choose a vendor that has immediate QR code delivery and clear support channels. Look for providers that offer plans specifically tailored for tablets, sometimes branded differently than phone plans.
- Install the Profile: Go into your iPad’s Settings, select Cellular Data, and then Add eSIM. Scan the QR code provided by the vendor. The profile downloads but remains inactive until you toggle it on.
- Define Activation Time: Crucially, look for an option that lets you choose when the data starts counting down. Many top-tier providers let you set the activation date for a few hours after your flight lands, giving you time to confirm everything works on the ground before the clock starts ticking.
- Test at Home: Before packing, turn off your home Wi-Fi and set your new travel eSIM to active while still connected to your home network. This tests the installation integrity, confirming the iPad sees the profile correctly and that the carrier system accepted the registration.
Doing this prep work means that the moment your plane touches down, you can simply tap the toggle, wait thirty seconds for the network handshake, and immediately start downloading your boarding pass or messaging your ride. It’s the difference between feeling instantly connected and staring down at a “No Service” notice.
Conclusion
Using an iPad with an active travel eSIM fundamentally changes global connectivity, offering reliable internet both as a dedicated hotspot and an indispensable backup line. This setup provides freedom from expensive network roaming and removes the battery anxiety associated with tethering from a phone.
To travel without worry, load a regional eSIM profile onto your cellular-enabled iPad before you depart; this single action ensures continuous high-speed access, letting you work or stream while keeping your phone free for immediate needs. For those heading to multiple destinations, choosing the best eSIM for Southeast Asia travel or similar regional packages simplifies the experience by maintaining one stable connection across borders. Combining your iPad’s massive battery with a dedicated data plan creates a robust travel hub that handles the heavy lifting, leaving you to enjoy the journey.